Following the success of the article about Amazon AWS and Keycloak, we would like to share an article on configuring SSO access to Google Apps using SAML protocol and Keycloak as an Identity Provider.
Note: Solution outlined in the current article was developed for Keycloak V.3. Please, feel free to contact us in case you have additional questions regarding the set up, of require assistance with you Google Apps project.
Read the step-by-step guide below:
Setting up Keycloak
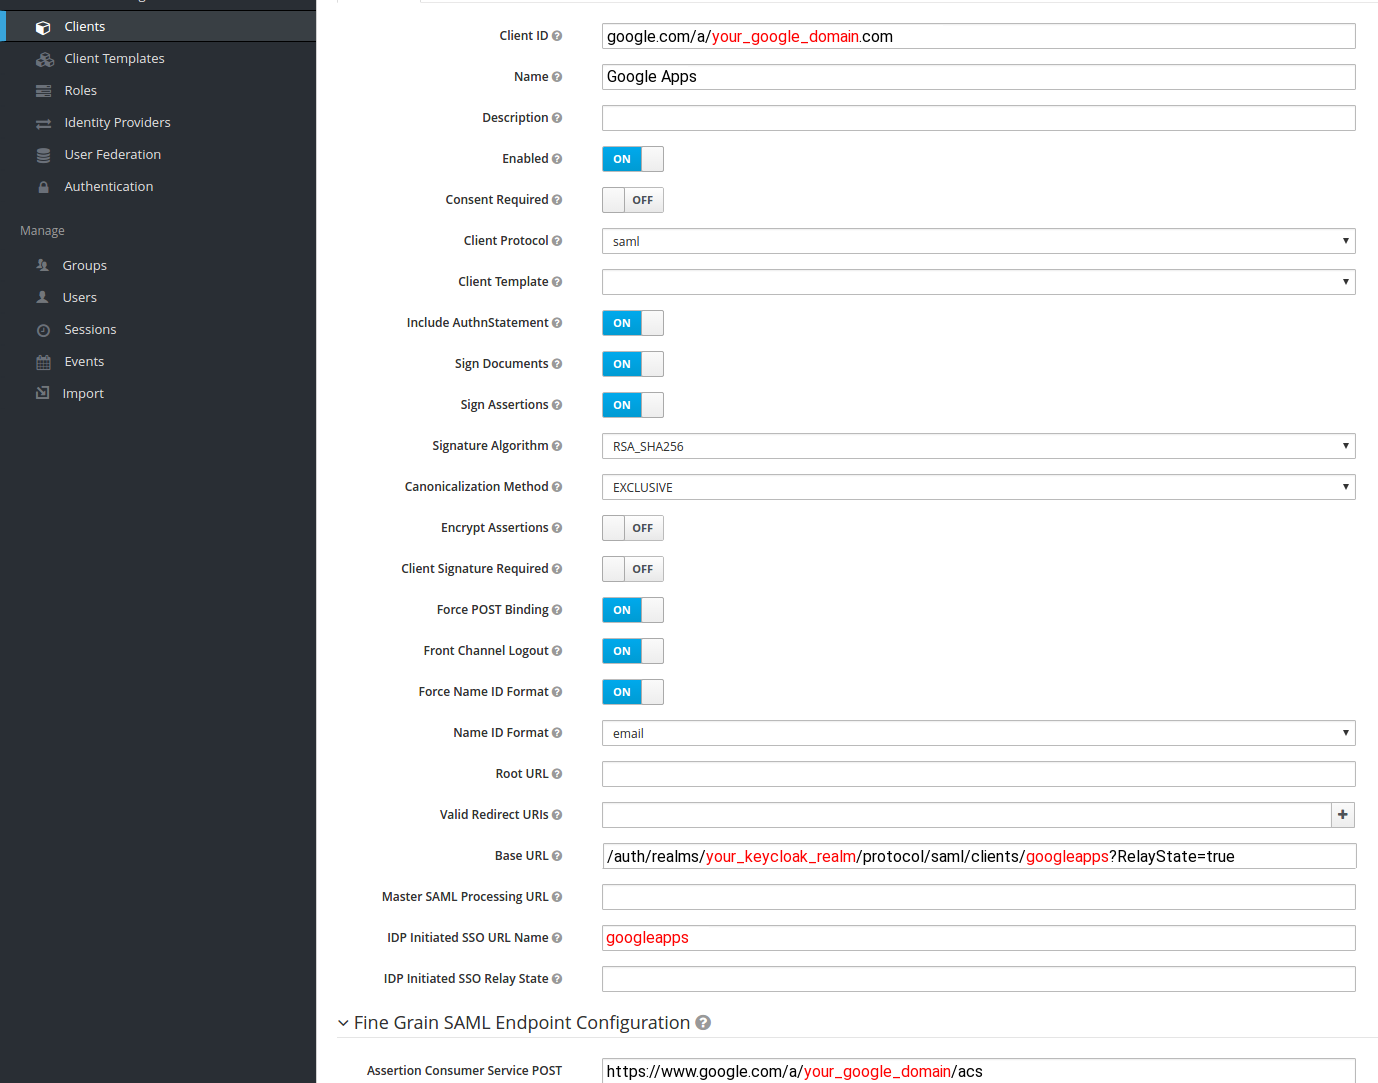
- First — create a new SAML client in Keycloak:
 Google SAML client configuration in Keycloak.
I haven’t found a saml-metadata.xml file for Google as a service provider, which you can import into Keycloak, so you have to set all client options manually.
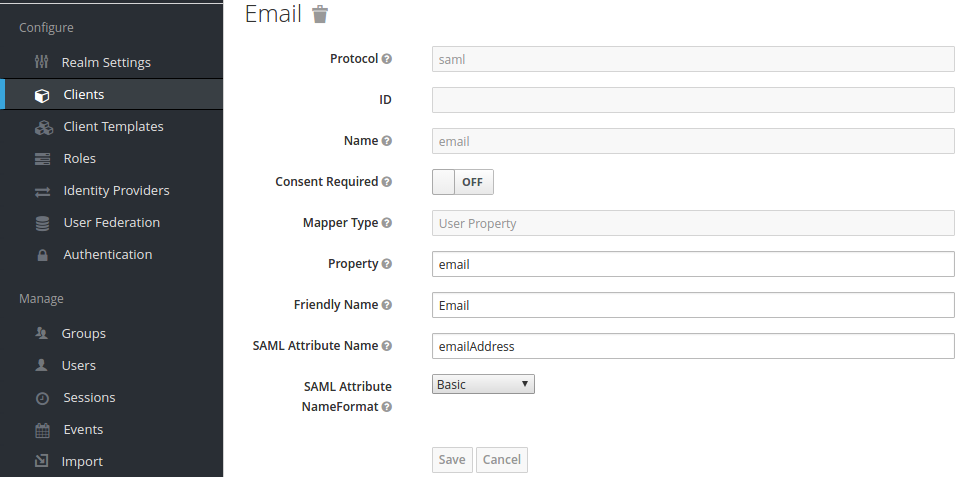
- After initial client setup, go to “Mappers” and create an “email” mapper:

This mapper will be used in SAML assertion to Google Apps, when SSO session between Keycloak and Google Apps will be initiated.
- Finally, go to “Installation” tab of the Google SAML client settings, and select:
“Format Option” — “SAML Metadata IDPSSODescriptor”.
- Copy the X509 certificate, which is located between
</dsig:X509Certificate>
tags.
This is the certificate which we will upload to Google Apps.
- Now, Google SAML client is ready for usage.
Google Apps SSO setup
For users to be able to access Google Apps using SSO and Keycloak, they’ll need to have an “email” attribute which corresponds with Google Apps user’s email address.
For example:
Keycloak user directory has a user with “email” attribute set to
“adam@your_google_apps_domain.com”
For this user to be able to access your Google Apps domain using Keycloak SSO, he needs to have an Google Apps user with
“adam@your_google_apps_domain.com”
email address.
To setup Google Apps SSO, go to Admin control panel for your Google Apps domain.
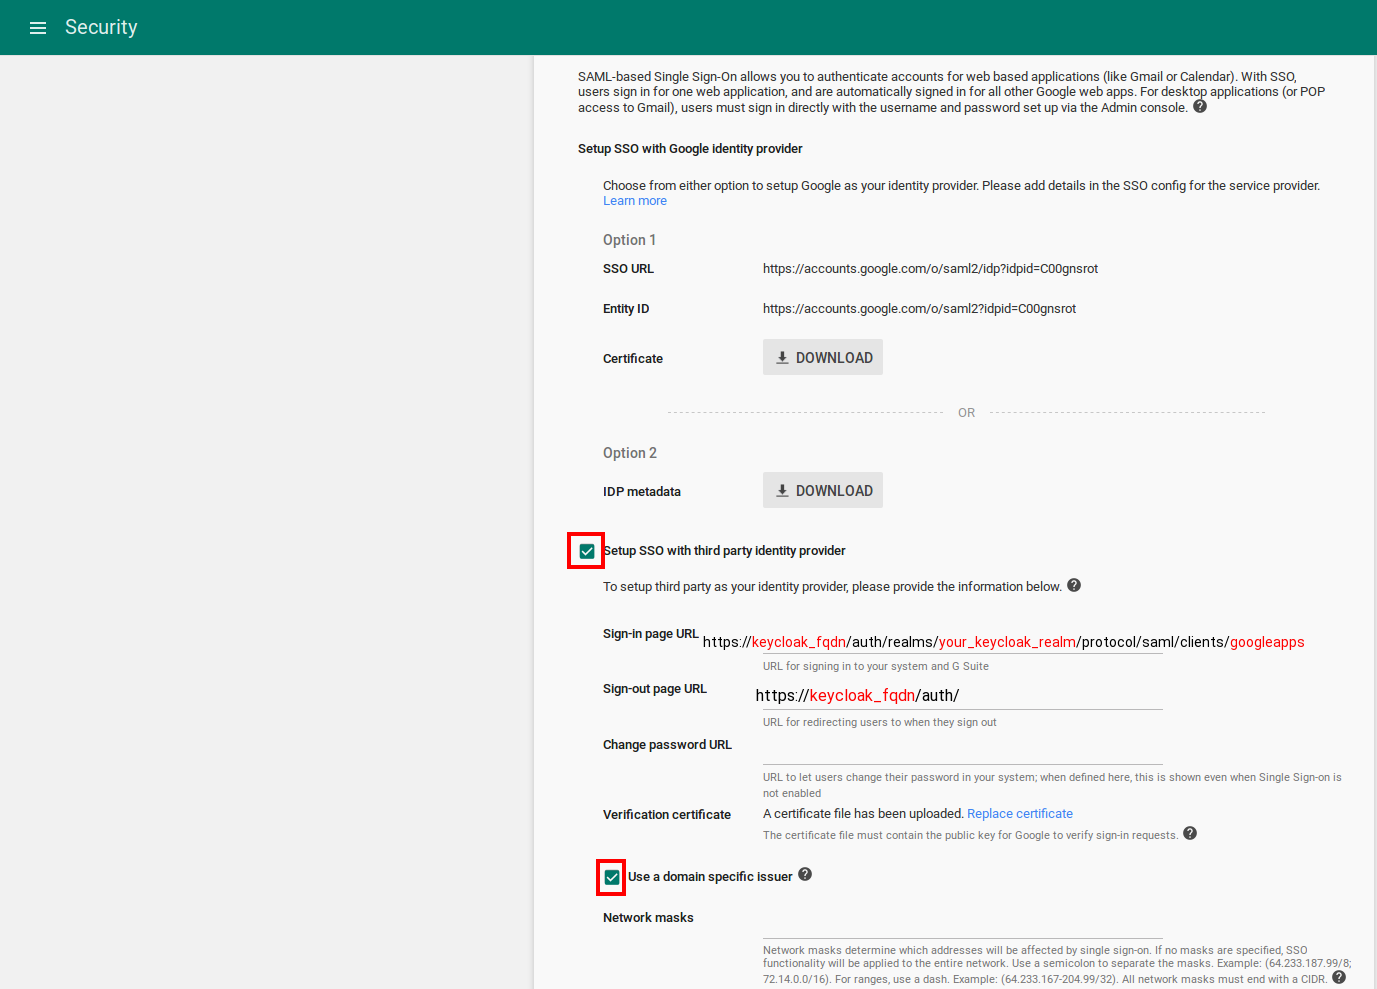
- Go to “Security” -> “Set up single sign on (SSO)”
- Check
“Setup SSO with third party identity provider”
checkbox
- In “Sign-in page URL” enter “Base URL” you’ve setup in Keycloak Google SAML client:
https://keycloak_fqdn/auth/your_keycloak_realm/protocol/saml/clients/googleapps
- For “Sign-out” page URL, you can set it to any URL you need.
In my case, I’ve set it to
https://keycloak_fqdn/auth/
- Upload your X509 certificate from Google SAML client from Keycloak.
- Also, check
“Use a domain specific issuer”
checkbox.
This checkbox will enable SSO specifically for your Google Apps domain.
 Goole Apps SAML configuration.
And, that is it!
Now, when you go to your Google SAML client in Keycloak, and press the “Base URL”, for example:
https://keycloak_fqdn/auth/realms/your_keycloak_realm/protocol/saml/clients/googleapps?RelayState=true
You should be redirected to Keycloak authentication portal, and after you authenticate, you’ll be redirected to your Google Apps account.
Also, you can access specific Google Apps using SSO, directly from web browser.
For example:
If you enter in location bar —
mail.google.com/a/your_google_domain.com
or
docs.google.com/a/your_google_domain.com
You’ll be redirected to Keycloak for authentication, and after you authenticate, you’ll be redirected to specific google app.
Still having trouble setting SSO authentification for Google Apps? Looking for tech assistance? You’ve come to the right place. Scandiweb is the most certified Magento agency in the world with more than a decade of experience under its belt. We’re here to help, so if you have any questions – drop us a line at [email protected] or check out our Technology services page.


Share on: