Cloud-based-only competitors like Shopify, Demandware and others have a limitation on payment methods: who and how may implement them on their platform and how it can be done. You’ll ask why? The eCommerce Payment Service provider market is the wild west with multiple options to choose from. There are several to pick from that will match your industry, business type, location and other specifics.
What about Magento? Already out-of-the-box Magento packs a punch with payment integrations: PayPal, Braintree, and Authorize. Net payment service providers. However, when it comes to 3rd party services, Magento 2 is one of or even the most, flexible platform out there. You integrate with other payment providers, using the Magento 2 Payment Provider Gateway.
Mixing-up both out-of-the-box and alternative Magento 2 payment gateways will make your store stand out and give your shoppers a much-needed variety payment options.
One such payment option is AfterPay Europe, a Pay After Delivery (PAD) system operating in Northern and Western Europe, offered by Arvato Financial Solutions (part of the Bertelsmann Group), with whom Scandiweb has been cooperating for a few years.
Implementation
Let’s put things straight — the initial implementation through the Payment Gateway is not easy. In fact, it’s time-consuming. However, once done, adding new payment methods becomes a rapid process thanks to the streamlined implementation with Magento’s payment gateway approach.
How does that work?
First, we need to add an additional entry in config.xml:
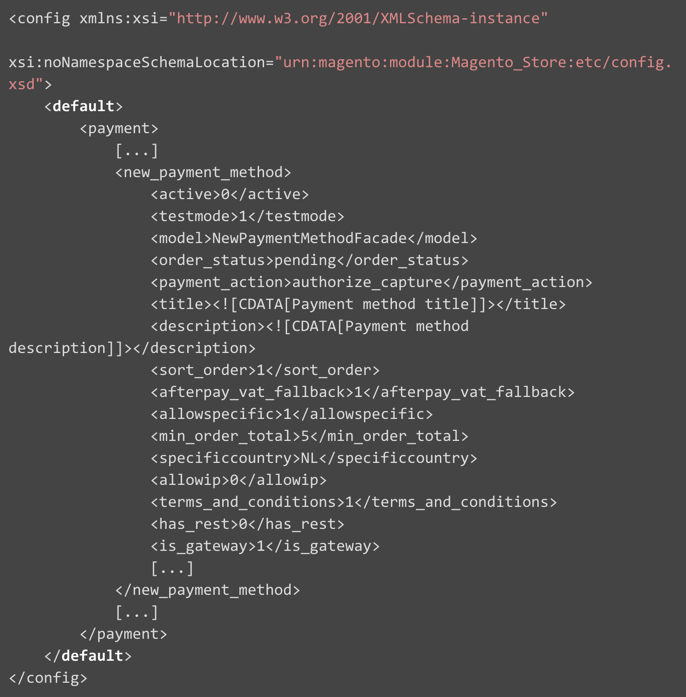
The most important parts are the is_gateway node, which determines if the payment method needs to be passed as a gateway payment method and the model node which loads a virtual class from the di.xml file.
di.xml Update
Afterwards, we need to update the di.xml with a new virtual class that helps remove a lot of the boilerplate code. Without it we would need to re-implement this every time.
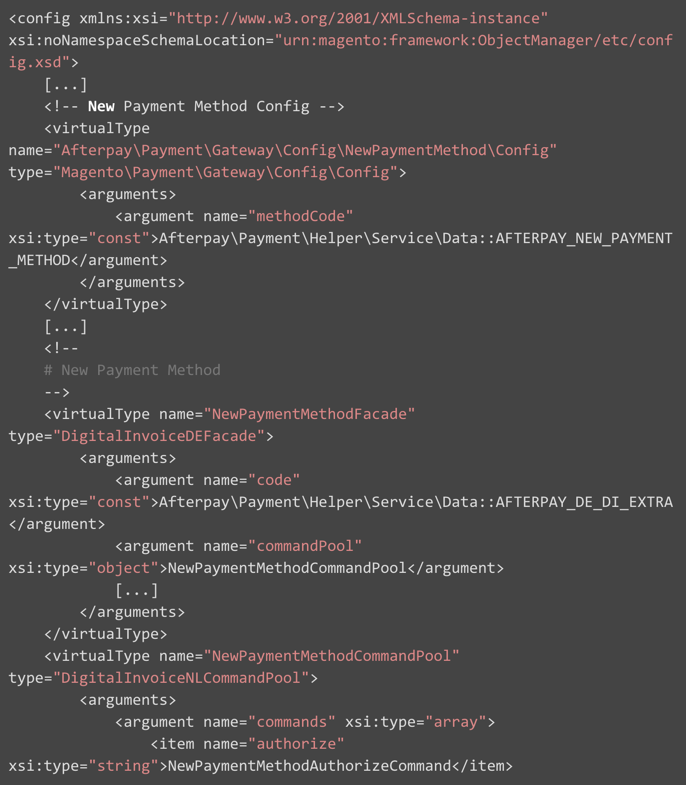
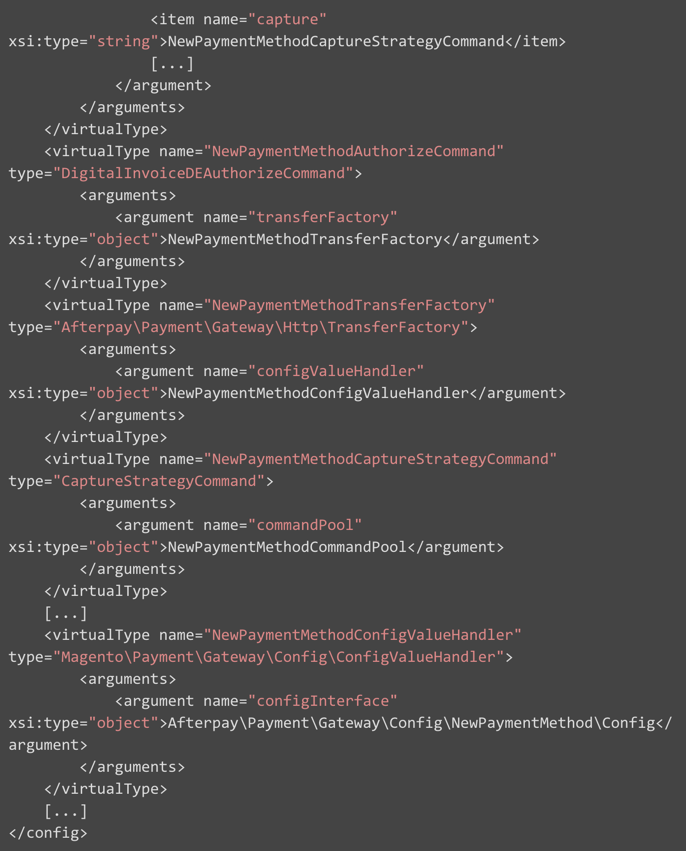
We take into account that we have a general facade which we extend. In addition to that, we’ll just update some of the method params with new specific ones for our particular payment method. Most of the payment work gets done with di.xml.
Payment Method FrontEnd render
Next up, we need to add an additional payment method renderer in the frontend.
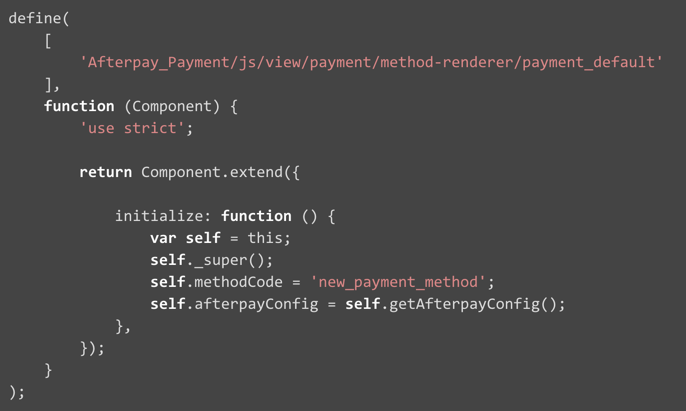
We only need to set methodCode and load the configuration from the backend.
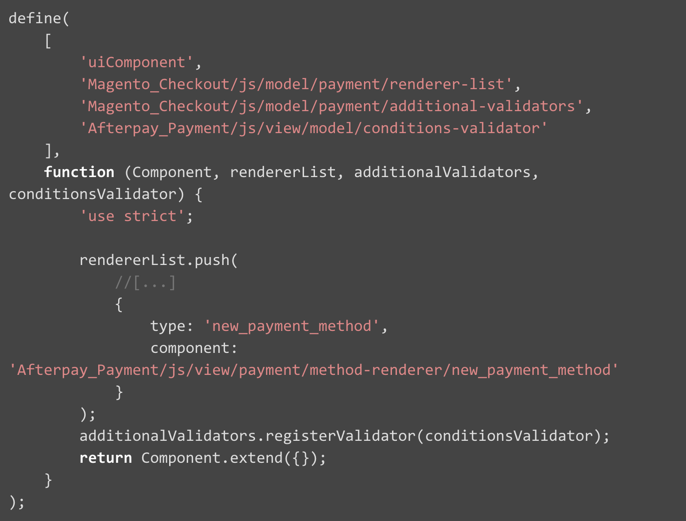
Global Method List
After adding a new method renderer, we also need to register it in the global method list.
Payment Method Configuration
We also need to add payment method configuration under global config loading for payment methods.
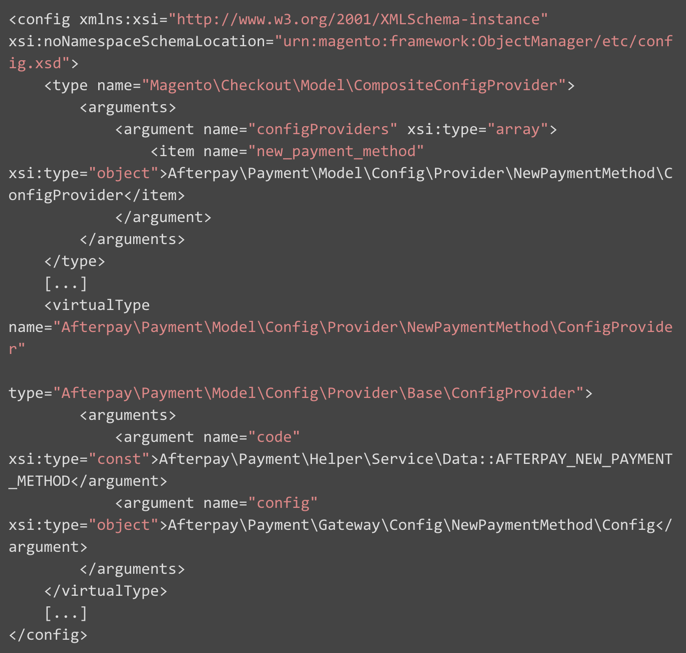
As a result, the following steps were executed:
- Added the main configuration under config.xml
- Updated the di.xml file with new virtual classes that remove boilerplate code
- Added a new JS renderer for the payment method
- Registered a new JS method renderer into the global list
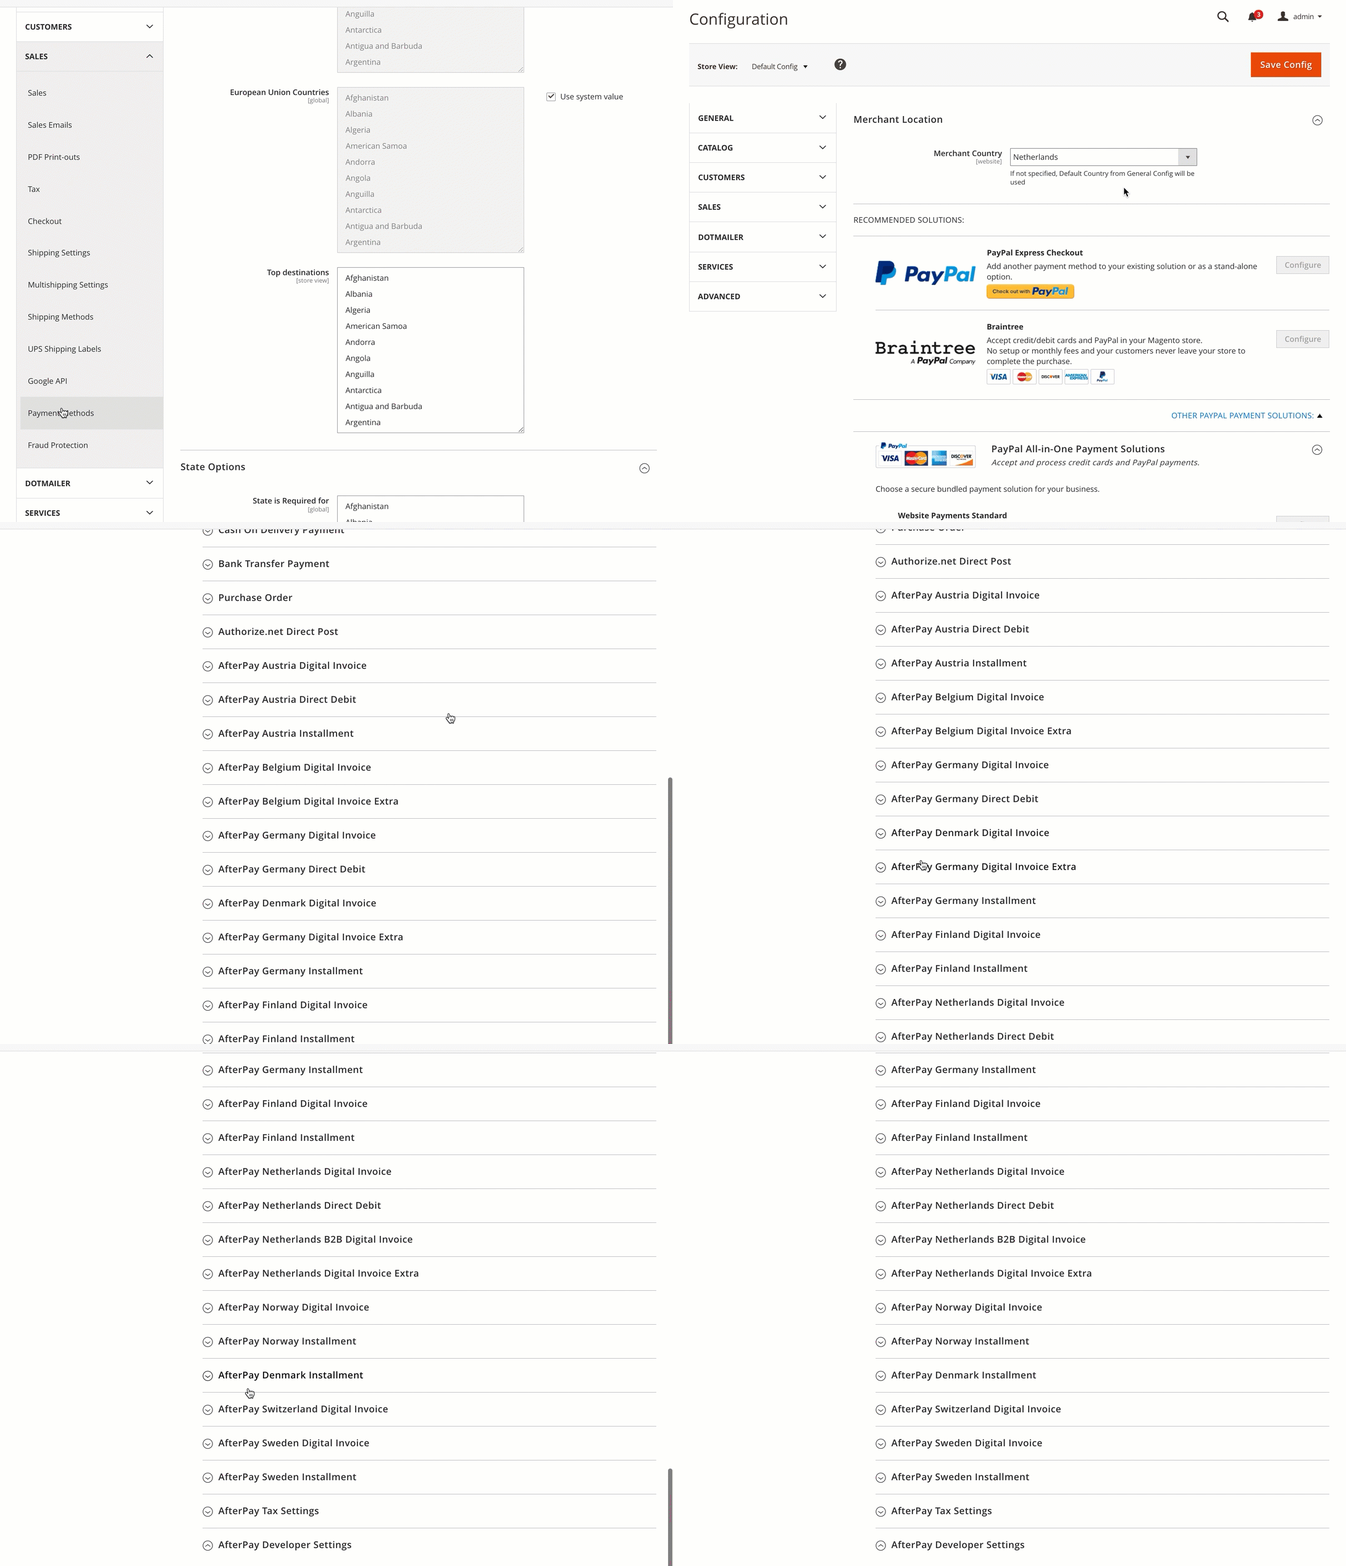
So how many methods can we add? Countless!
There’s no limit. In this case, we’ve added 22 payment methods and there are still more to come.
Payment Gateway API Documentation: AfterPay.io
With this particular implementation, all calls are made to AfterPay using REST APIs. The AfterPay library handles payment processing, is fully unit tested, and comes with examples on how to get started.
What about features?
Custom Payment Configurations
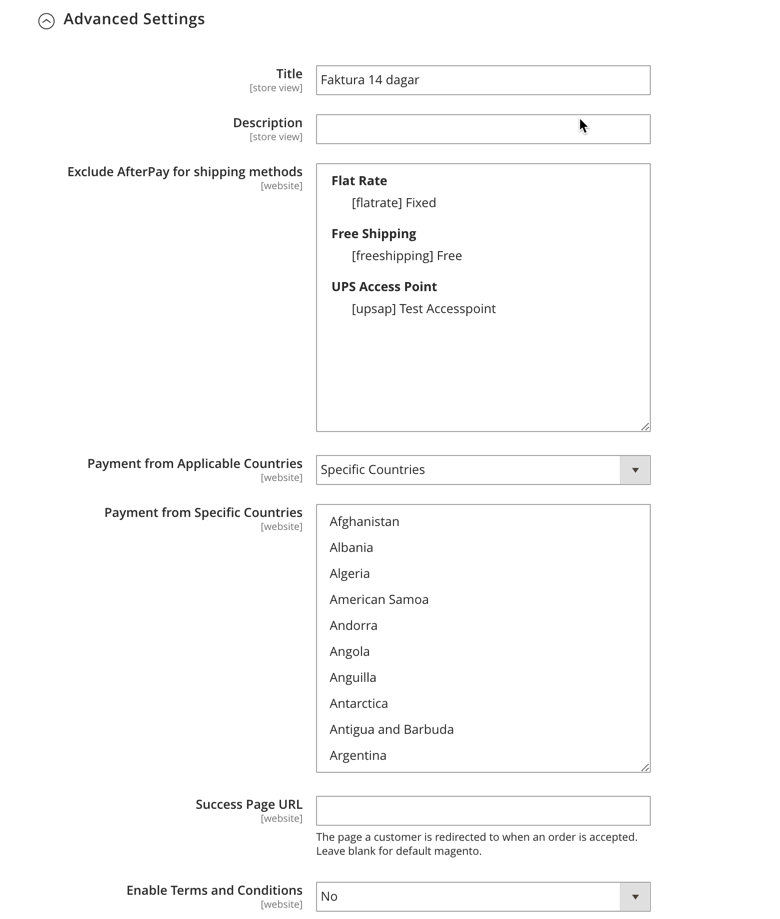
Each payment method comes with a configuration that allows adjustment for Applicable countries, Custom Success page URL, Additional Debugging options, as well as Shipping method exclusions.
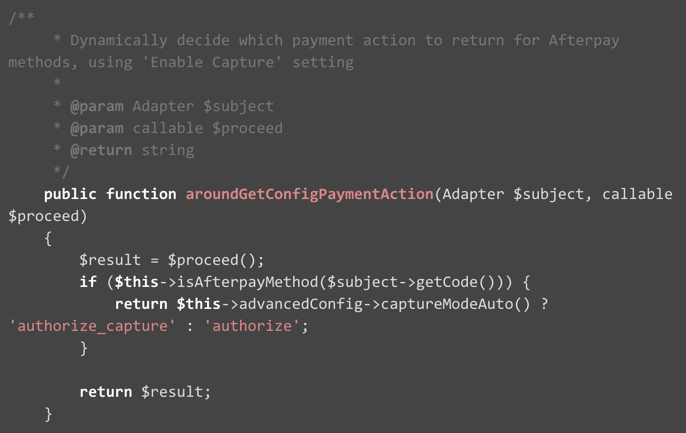
Bespoke Authorize & Capture setup
With a simple Admin configuration, you’re able to set either Authorize & Capture as automatically executed after the order status is set to Shipped or, should your business have a custom order workflow, set on a custom order status. How does it look?
- Manual — Manual Capture Execution via Admin
- Yes, direct — Automatic Invoice Creation
- Disabled — Offline payment Capture
- Yes, at shipping — Executed when the shipment is sent out — status Shipped
- Yes, at selected status — Custom Status
From the code perspective the implementation is as follows:
Magento TAX Class Utilization
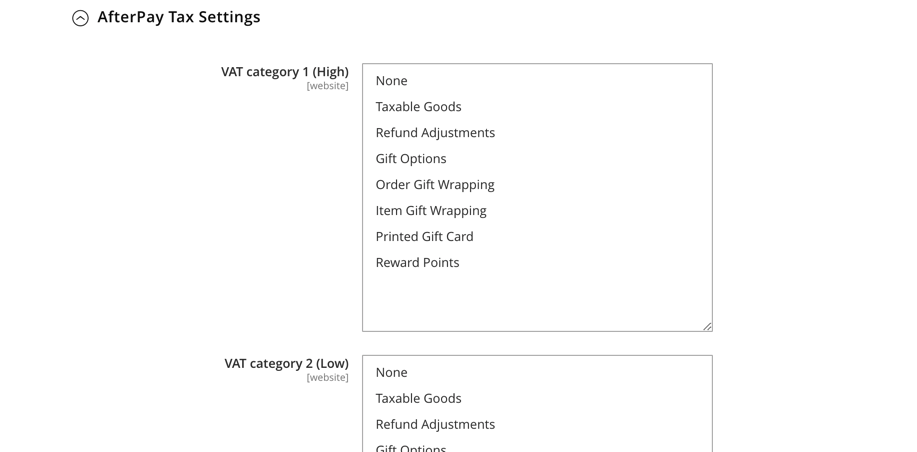
Configure Payment method Product Tax Class using the default Magento Tax Class configurations.
Conclusion
The result is a payment method solution (extension) built by Scandiweb that is reliable, convenient, and flexible for merchants of any type and any business needs. It’s easy to implement and maintain as your business and payment specifics scale.
Looking for Magento development services? Are you a payment provider who wants to develop your own Magento 1 or Magento 2 extension? Reach out to us!
Related articles:
Ledyer B2B Payment Module for Magento (Adobe Commerce) Launched




Share on: