Frictionless checkout is a cornerstone of excellent customer experience. As consumers increasingly value speed and convenience during their shopping journeys, the demand for self-service technologies in physical stores has surged. Self-checkout systems that follow best practices streamline the payment process, reduce wait times, and empower the store’s customers.
However, successful implementation hinges on paying careful attention to user experience (UX), user interface (UI), and usability, while a poorly designed self-checkout can lead to user frustration.
You also need to keep in mind that physical stores are crucial components if you want to deliver a seamless omnichannel experience. A self-checkout that aligns with the efficiency of eCommerce provides the consistent, convenient service that modern consumers expect across all shopping channels.
Usability best practices
Self-service UX/UI can be affected by the environment around the kiosk and the types of products or services offered. The following 9 tips cover the most common customer expectations regarding user-friendly self-checkout design:
- Make it simple—simplicity sells, so don’t add features unless they’re genuinely needed
- Bigger is better—make buttons, forms, and other elements large to avoid annoying clients in public by them not being able to press the button or field; consider increasing the clickable areas around the objects by a few pixels as well
- Minimize hand movement—ensure that users do not need to touch the screen’s top/bottom/left/right after each step; minimal hand movement is crucial to success when we speak about screens larger than 20 inches
- Consider the average height of the user—consider this at the beginning, and don’t forget about accessibility features
- Avoid typing—use autocomplete or suggestions as a solution to make typing more comfortable if unavoidable
- Remember about no hover—clickable objects should look clickable because there is no pointer or hover effect, and non-clickable elements should not look clickable
- Consider the environment—overlit rooms can be fixed with a higher brightness screen but should also have more contrast; while sound can significantly assist users, it can annoy some or not work in loud places
- Steer away from search—the UX is probably bad if you think you need a search bar; users are more likely to give up than use search because they want to avoid typing, as mentioned above
- Auto log-out—users tend not to close their sessions at kiosks before going away; to avoid giving the following user a bad experience, integrate an auto log-off or sensor that detects when to start a new session.
User journey overview
User journey during a self-checkout should be as clear and straightforward as possible, minimizing customer frustration and enhancing their overall shopping experience. Let’s break down the typical user journey into several key steps customers encounter when using self-checkout kiosks.

Step 1: Welcome screen
- Clear instructions on how to scan products
- Possibility to choose the language
Step 2: Order list
- Products registered on the screen
- All products and order total are available
- Option to add loyalty card, bag, or request help from staff
Step 3: Payment method
- Users can choose their preferred payment method
- Users can add a gift card or coupon code
Step 4: Final payment
- Users insert a card, cash, or scan a gift card
Step 5: Confirmation
- Order success message
Elements in self-checkout
Self-service checkout should prioritize minimalist design and functionality, eliminating unnecessary distractions and focusing on the most important actions. We’ve compiled a list of all crucial elements and features to include in a self-service checkout to deliver the best possible UX:
- Intuitive buttons and layout to guide users through the self-service process
- Option to revert the action with a revert button inside the products list rectangle
- Back button for every screen
- Possibility of applying coupons
- Option to scan a loyalty card at any point
- Simplicity and clarity in your UI design
- Clear labels
- Straightforward navigation
- Minimalist design that emphasizes functionality and eliminates unnecessary distractions
- Contextual help and guidance throughout the self-service journey;
- Tooltips, FAQ sections, and step-by-step instructions that assist users in completing tasks
- Accessible customer support
- Clear, timely, and informative feedback to keep users informed and engaged
- Concise, actionable, and user-friendly error messages
- Suggestions or solutions to help users rectify issues and continue the self-service process.
Self-checkout real-life examples
When implemented right, self-service checkouts can offer convenience and significantly enhance the shopping experience. Here are a few notable examples from various retailers highlighting different approaches and technologies used in self-checkout systems.
Decathlon & UNIQLO
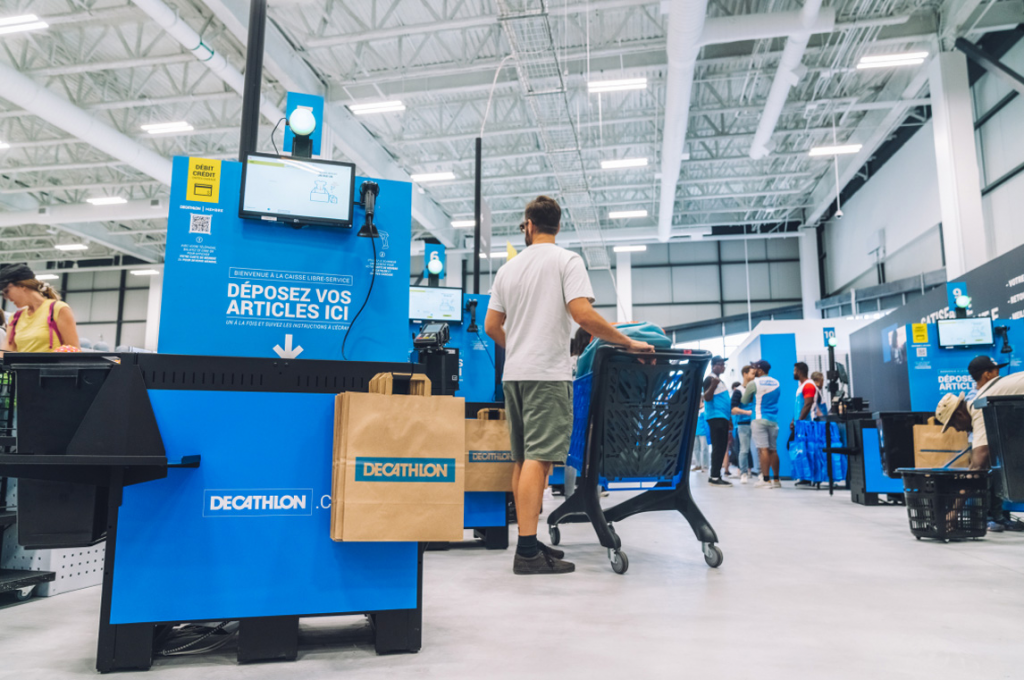
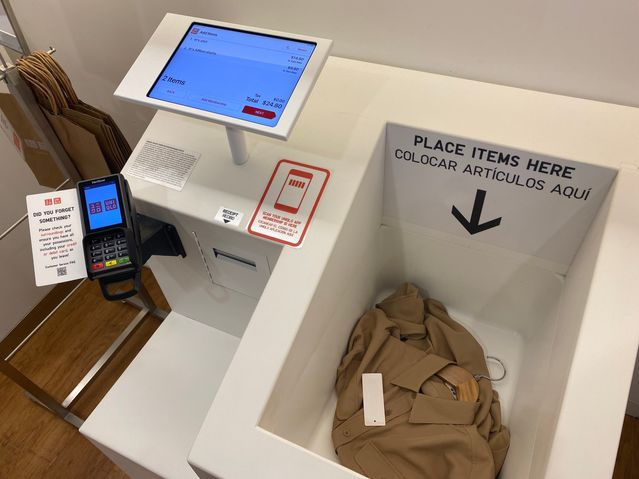
Both Decathlon and UNIQLO utilize similar technology in their self-checkout systems. Customers place their items into a designated container bin, and the system automatically scans them simultaneously, eliminating the need for individual item scanning. This method significantly speeds up the checkout process and reduces the opportunity for user error, streamlining the customer experience.
Nike + “House of Innovation 000”
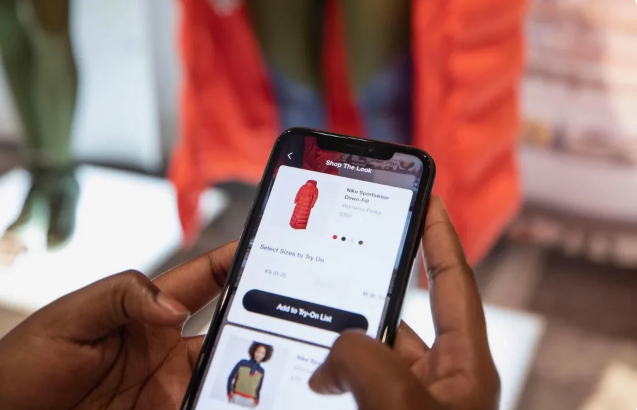
Nike offers a uniquely integrated experience with its “House of Innovation 000” app. Shoppers use the Nike app to scan products as they shop. They can then checkout directly from their device using pre-stored payment methods. This method speeds up the purchasing process and personalizes the shopping experience, allowing customers to avoid traditional checkout lines entirely. After paying, customers bag their items and receive a digital receipt within the app.
Rimi
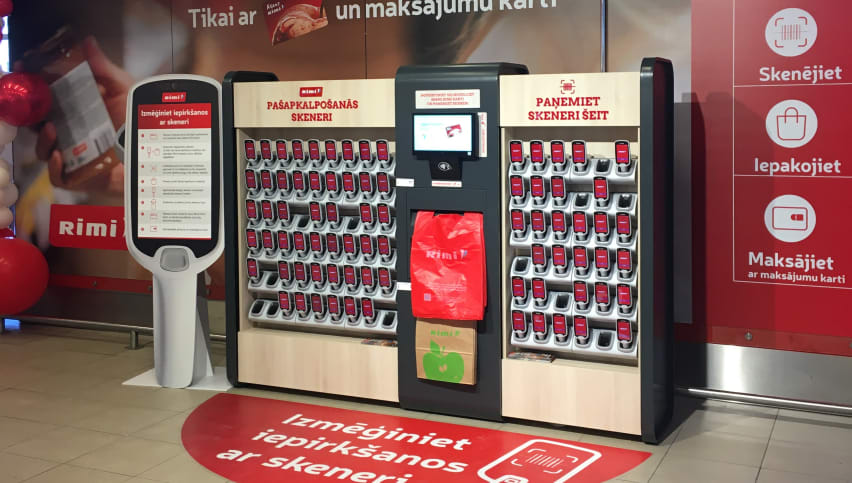
This supermarket chain offers two types of self-checkout. Customers can scan each product individually and place them in a bin as they shop or use a mobile scanner provided by Rimi after activating their client card. The second option lets customers scan and bag items while they shop, paying at a dedicated checkout zone. This flexibility caters to different shopping preferences and speeds up the checkout process.
Maxima

Initially receiving negative feedback, Maxima’s self-checkout required customers to scan each item separately and listen to repetitive, loud instructions after each scan. However, following customer feedback, they modified these instructions to create a more pleasant checkout experience. Today, customers at Maxima can use these systems with less auditory disruption and have the option to pay via card or cash.
Amazon Fresh
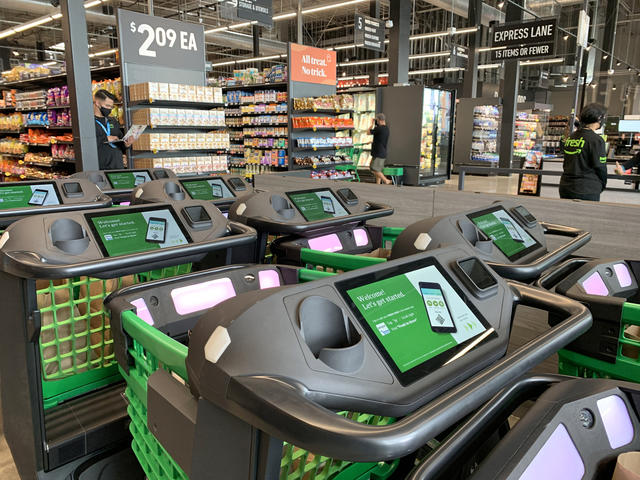
Perhaps one of the most advanced implementations is seen with Amazon Fresh. Shoppers use a cart integrated with the Dash Cart technology. They place their items in the cart and scan a QR code from the Amazon app. As customers exit the designated lane, their payment is processed automatically, leveraging a seamless, nearly contactless shopping experience.
Are you considering introducing or improving self-checkout solutions in your retail operations? Make sure you get it right with our team of UX experts by your side. Reach out for a free consultation by using the contact form below!

Share on: