Communication with customers and customer retention is a crucial aspect of any eCommerce store. One of the steps to the success of this communication is the correct implementation of email service providers with your eCommerce store.
There is a great variety of platforms that can be connected to your Magento store. Today we’ll take a closer look at Mailchimp integration for Magento using an extension, with an easy-to-remember name – Mailchimp for Magento.
The full setup documentation is available on the Mailchimp website, however, there are cases when the setup of this extension doesn’t go as smoothly as planned and the information about the possible issues is quite scattered around different sources. By going through this process various times and understanding all hidden stumbling points, we have summarized all the tips for a pain-free setup from a marketer’s point of view.
Make sure MageMonkey is completely uninstalled
If your Magento store is operating for many years and you’ve been using Mailchimp before, the possibility that you’ve also been using MageMonkey is quite high. As Mailchimp for Magento documentation states, you must uninstall MageMonkey before you can use Mailchimp for Magento.
We ourselves have experienced that even after the developers have removed MageMonkey, we were not able to successfully set up the connection between Magento store and Mailchimp. The reason was – while removing the MageMonkey from the store, not all paths and tables in the database were removed, which resulted in errors.
Common errors during the synchronization process
There is a possibility you’ll receive the following error during the synchronization process:

Based on information found on Ebizmarts (extension developers) website, there are 3 scenarios when this error appears:
- You have a parent scope configured.
- Using multi-store with the same domain under a Mailchimp account.
- Orphan Mailchimp Store.
We’ll take a look into the second and third scenarios next.
An orphan store is blocking the connection
In case you had previously connected your Magento store with your Mailchimp account using MageMonkey, then after you uninstall MageMonkey you leave an orphan store in Mailchimp that is not allowing you to connect it using the new extension Mailchimp for Magento.
To solve this you need to go to Mailchimp, login into your account, and go to the Connected Sites page.
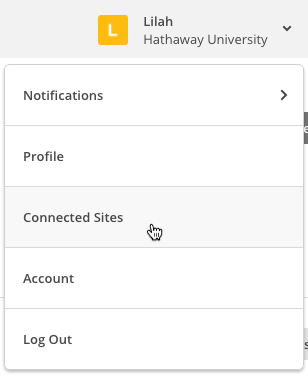
There you’ll see the store that is connected and in the lower-left corner, you’ll find a Disconnect button, which allows you to remove the orphan store.
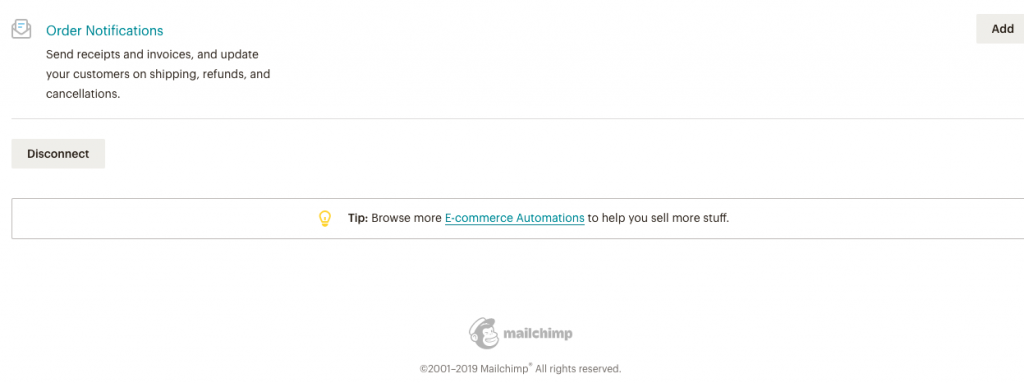
In case you don’t see the connected account, we advise contacting Mailchimp’s support and verify with them if you don’t have any orphan stores that are blocking the connection.
Ensure connection for multi-store websites
Mailchimp allows connecting several store views to Mailchimp. If your store views have a separate subdomain, you’re all good and will be able to connect all of them with your Mailchimp account.
However, if you use subdirectories to separate your store views, you won’t be able to fully connect all of them to Mailchimp account.
The situation is as follows: one store view will completely connect to Mailchimp and will be visible in the “Connected Sites” section. The other ones will sync with Mailchimp, however, they won’t be visible in MailChimp and they’ll not support any Connected Site-specific features like Product Retargeting, Abandoned Cart emails, or Google Ads.
This means that the newsletter subscribers and order data from all store views that are not fully connected will be synced with Mailchimp, but as mentioned above, the Connected Site-specific features in Mailchimp won’t be available.
The bottom line is that you need to decide which store view you want to fully connect with Mailchimp to use the full scope of the functionality.
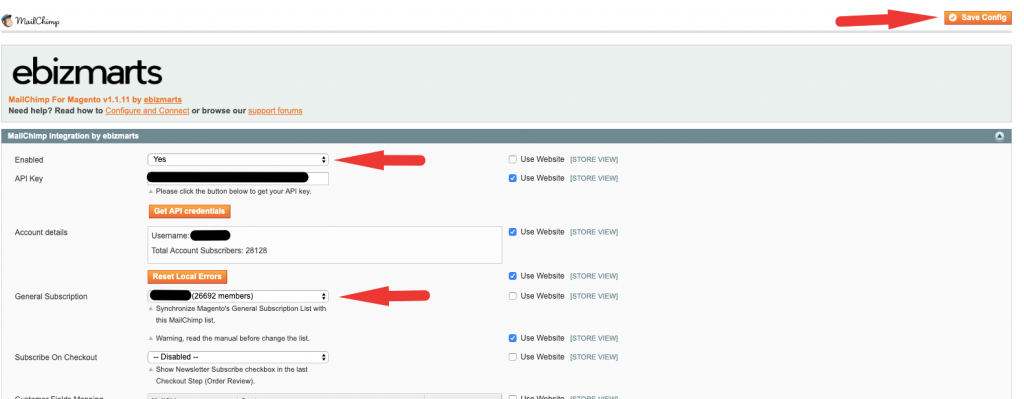
Important to remember for proper connection is that each store view (each subdirectory) should be connected to a separate mailing list. You’ll need to create new audiences in Mailchimp for each store view you plan to connect. And in BE for each store view, you’ll need to specify the list you want to pass your subscribers to (see the picture below).
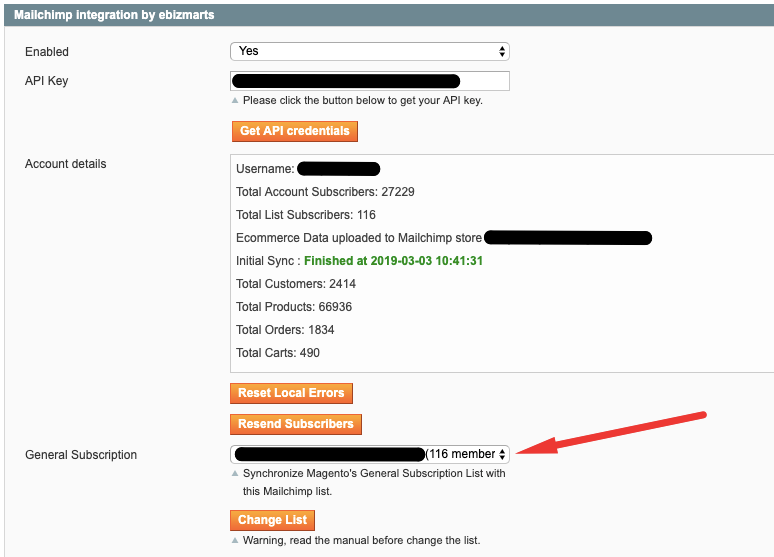
Connection steps for multi-store setup after errors have been resolved
In case you’ve experienced issues with connection and have received the errors mentioned above we suggest following these steps:
1. Uninstall MageMonkey extension correctly (ask for developers’ help).
2. Open the Connected site’s section on Mailchimp and disconnect the sites.
3. Go to Magento backend and clear the cache.
4. On Mailchimp extension settings click save configurations at default scope – don’t enable the extension for the default scope, just save configurations (see picture below).
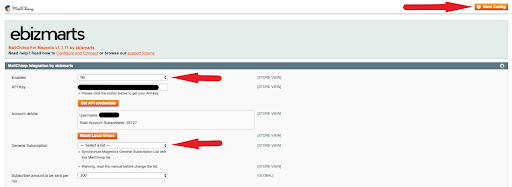
5. Enable the extension and save configurations in the extension settings for the store view that you want to connect. Remember, to assign separate lists for each store view you’re connecting.
Conclusion
The extension setup sometimes can be a quite complicated task, especially from a marketers’ perspective. In the beginning, it could even seem too complicated and you might have more questions than answers, but don’t be afraid of asking for help from the developers, and service provider support. Mailchimp support is always open to answer all your questions, as well as extension developers can support you in the setup process.
Did you find the tips useful? Have you tried to install the extension yourself? Do you need help with installing marketing-related extensions and solutions? Drop us a line at [email protected] or check out our Growth Marketing services page.


Share on: