In this article, we will share a guide on how to set up SSO authentification for Amazon AWS using SAML protocol and Keycloak as Identity Provider.
This SSO implementation guide is split into 3 parts:
- Initial Keycloak Identity Provider setup
- Amazon AWS Service Provider setup
- Finalizing Keycloak Identity Provider setup
Note: The solution outlined in the current article was developed for Keycloak V.3. Please, feel free to contact us in case you have additional questions regarding the setup or require assistance with your AWS project.
What is single sign-on (SSO)?
Single sign-on (SSO) is an authentication method that allows users to safely authenticate into several websites and applications with a single set of login credentials, e.g., a name and a password.
Let’s begin our AWS SSO setup guide!
Part 1: Keycloak Identity Provider setup
Keycloak is a Red Hat developed Identity and Access management solution, which supports multiple SSO protocols like SAML, OpenID, and OAuth2.
- The First step you need to do is to get saml-metadata.xml from Amazon AWS.
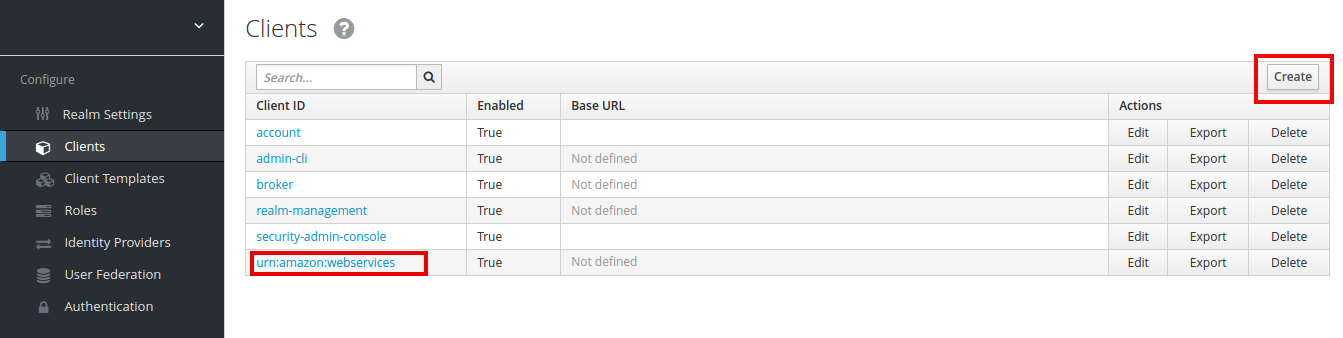
- After you saved the saml-metadata.xml file, go to your Keycloak server, go to the Clients section and create a new client:
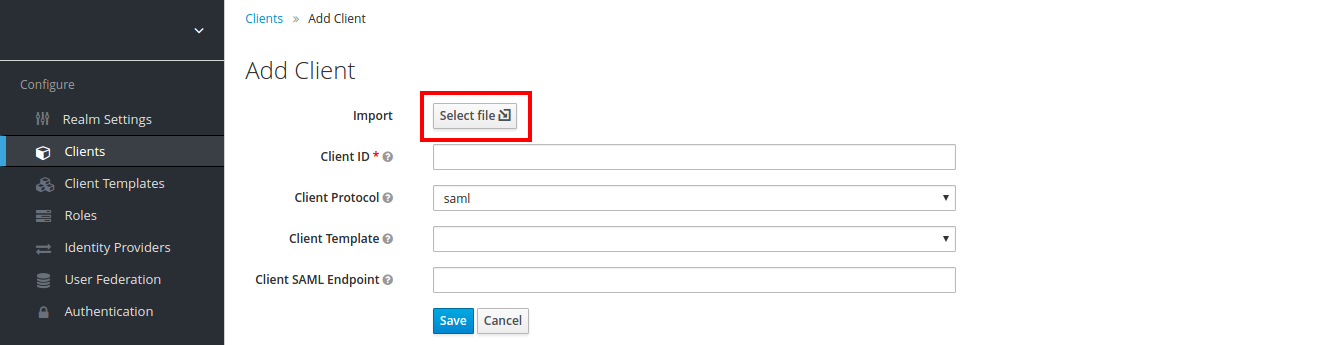
- Import Amazon AWS saml-metadata.xml:
- After you import saml-metadata.xml, most fields in Client settings will be populated automatically, based on information from saml-metadata.xml:
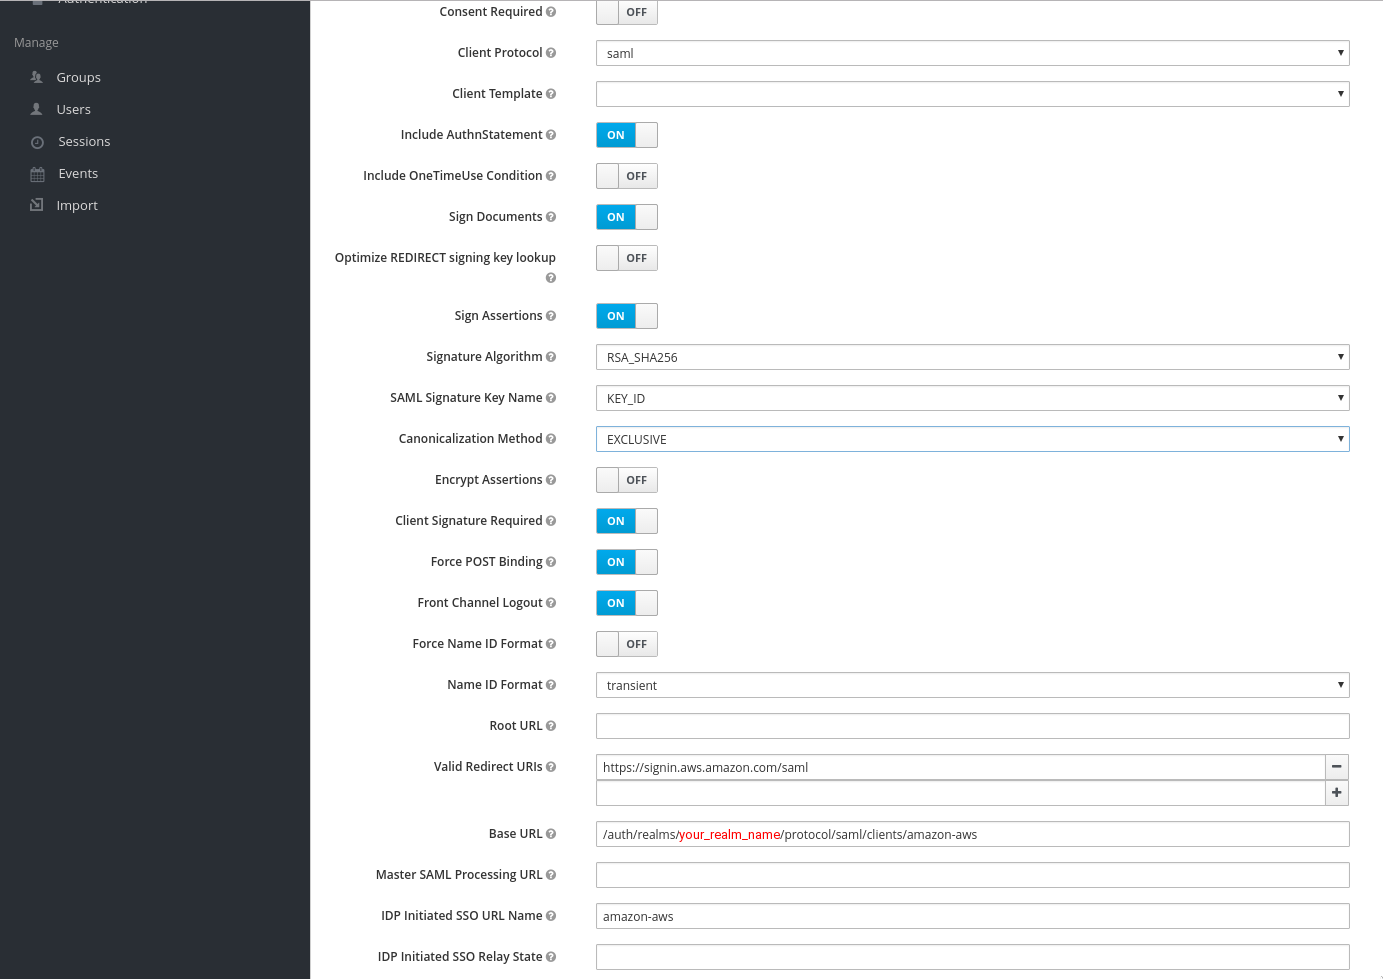
The only fields you need to fill are the Base URL and IDP Initiated SSO URL Name.
- Set your Base URL to:
/auth/realms/your_realm_name/protocol/saml/clients/amazon-aws
- and IDP Initiated SSO URL Name to
amazon-aws
- Press Save
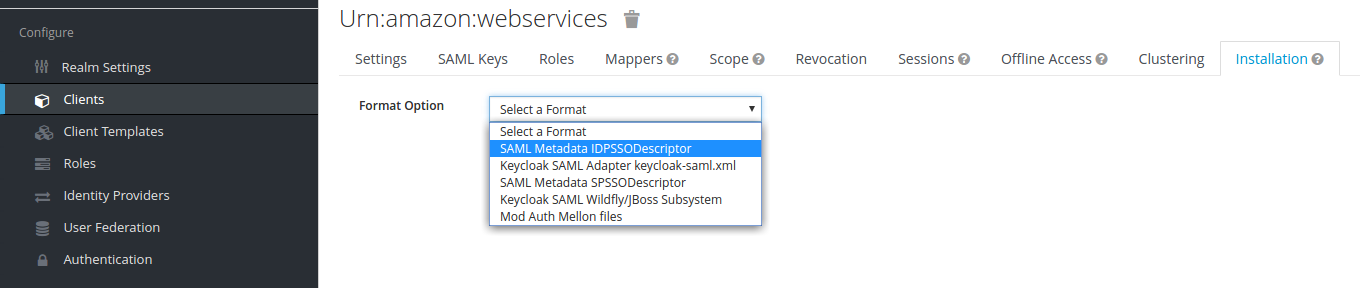
- After you have saved client settings, go to the Installation tab, select SAML Metadata IDPSSODescriptor, and press Download.
Part 2: Amazon AWS Service Provider setup
- When you have downloaded the client-tailored-saml-idp-metadata.xml file, go to your Amazon AWS account.
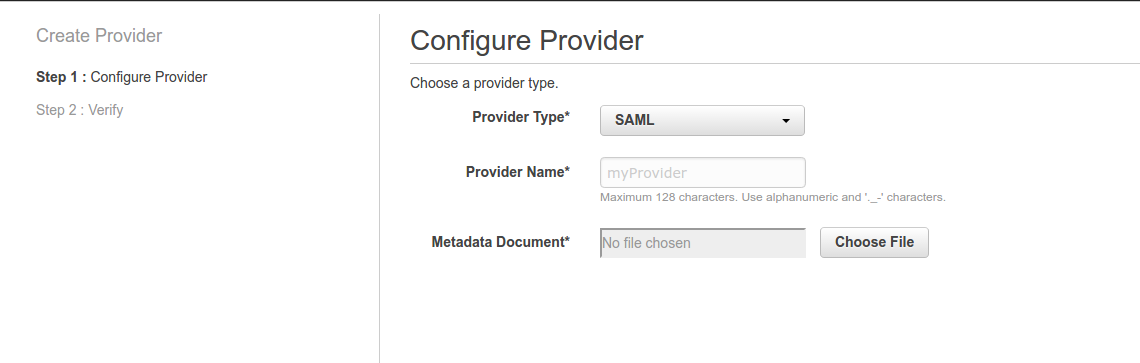
- Go to the IAM section, select Identity providers, and press the Create Provider button.
- Choose SAML as the provider type, set the provider name, and upload the client-tailored-saml-idp-metadata.xml file downloaded from Keycloak.
- Press Next Step and then Create.
- After you have created your SAML Identity Provider, you need to create an IAM role for this provider.
- Go to the IAM section and select Roles.
- Press Create New Role and set role name.
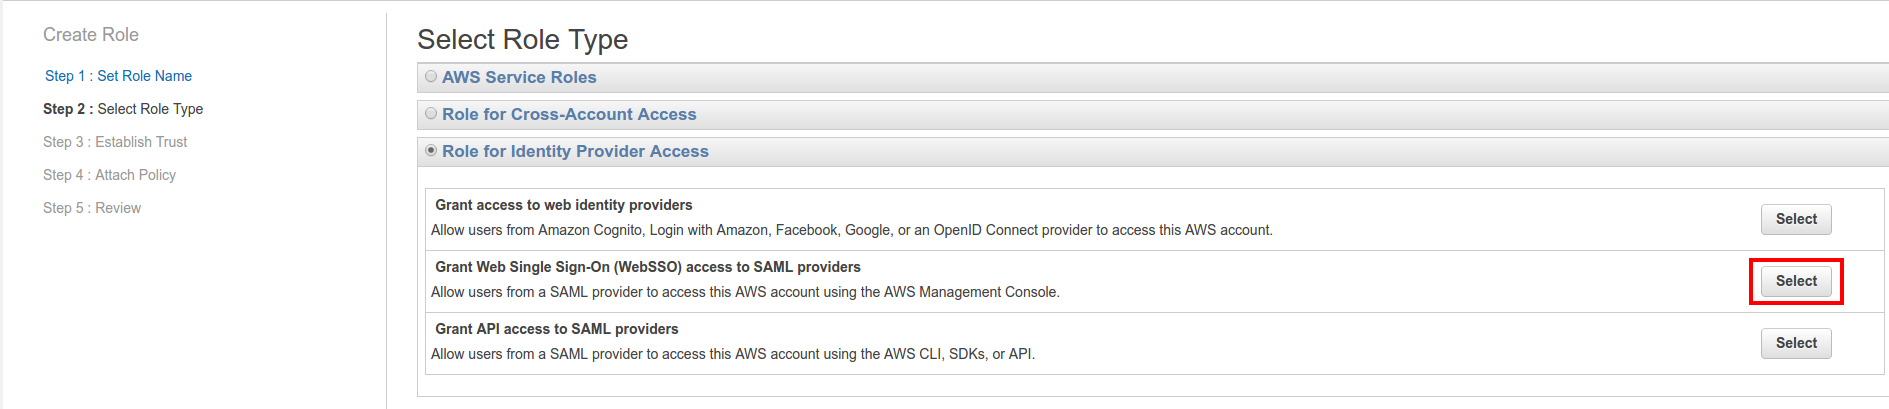
- For Select Role Type choose
Role for Identity Provider Access
and
Grant Web Single Sign-On (WebSSO) access to SAML providers
- Establish trust between IAM role and SAML provider:


If you don’t need to set any optional conditions, you can just go to the next step and leave these settings at default.
- Attach IAM Policy to SAML role:

- Review role settings and press Create Role.
Part 3: Finalizing Keycloak Identity Provider setup
- After the IAM SAML role in AWS has been created, go to role summary and copy Role ARN, it should look like this:
arn:aws:iam::aws_acct_id:role/aws_iam_saml_role,arn:aws:iam:aws_acct_id:saml-provider/aws_iam_saml_idp
Go back to your Keycloak server, go to your realm in which you created the AWS SAML client, go to the Roles tab, and press Add Role:

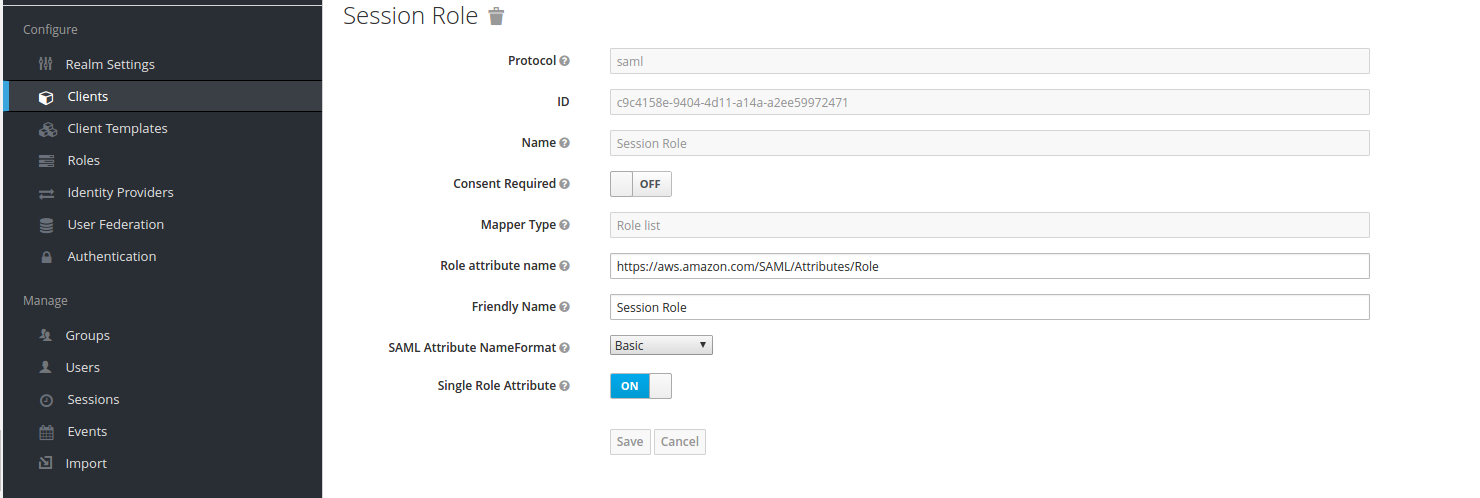
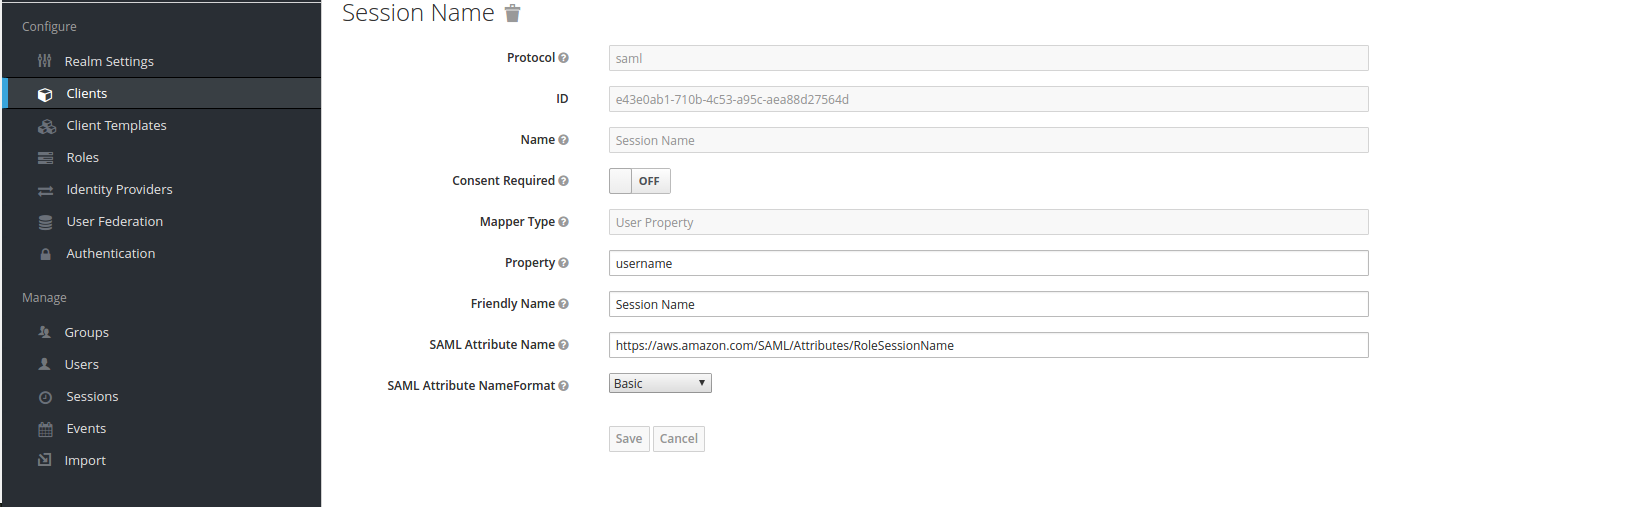
- After that, go to the Mappers section and create mappers for Session Role, Session Duration, and Session Name
- Session Role mapper:
- Session Name mapper:
- Session Duration mapper:

These mappers are required as per Amazon AWS SAML documentation.
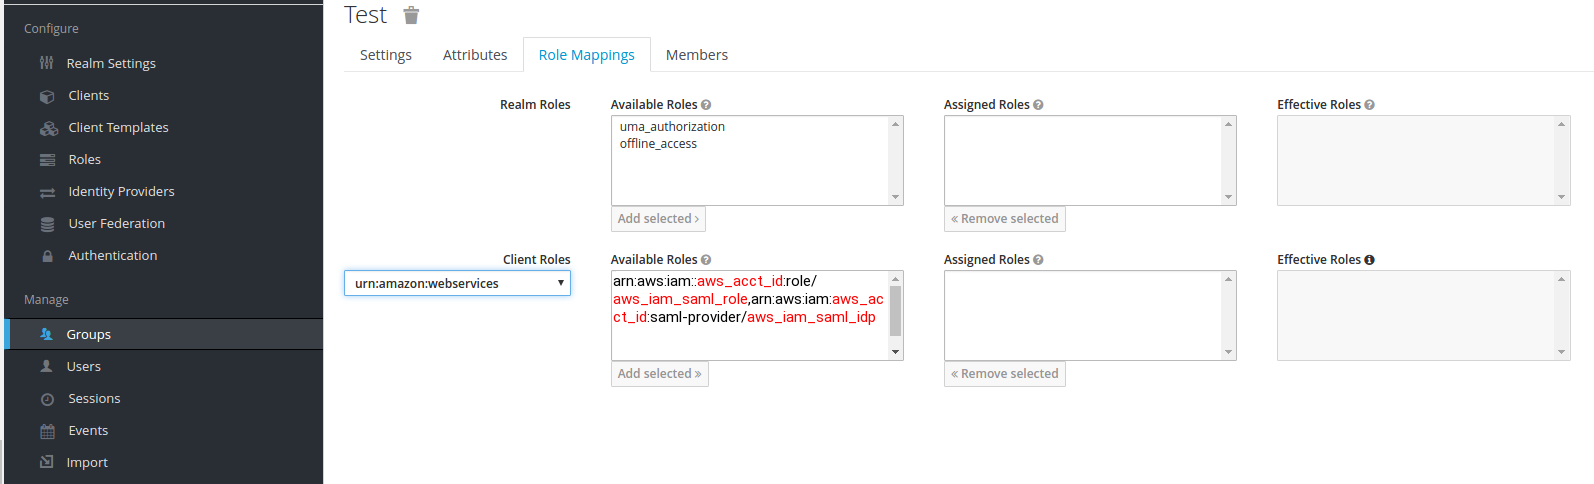
- After Mappers, go to the Keycloak realm Manage section, select Users or Groups, choose which group or user will be assigned to the AWS SAML role, and assign it:
- Finally, go back to your defined AWS client, and press the Base URL link:

- After you press the Base URL link, it should redirect you to the Keycloak login page, where you’ll need to enter the user name and password for the user, who is a member of a group that has been assigned to the AWS IAM SAML role defined in Keycloak.
And that’s it—your SSO configuration is complete! After you enter your credentials, hopefully, you’ll be redirected to the Amazon AWS console.
Still having trouble setting SSO authentification for Amazon AWS? Looking for tech assistance? You’ve come to the right place. Scandiweb is the most certified Magento agency in the world with more than a decade of experience under its belt. We’re here to help, so if you have any questions – drop us a line at [email protected] or check out the technologies we work with.

Share on: