
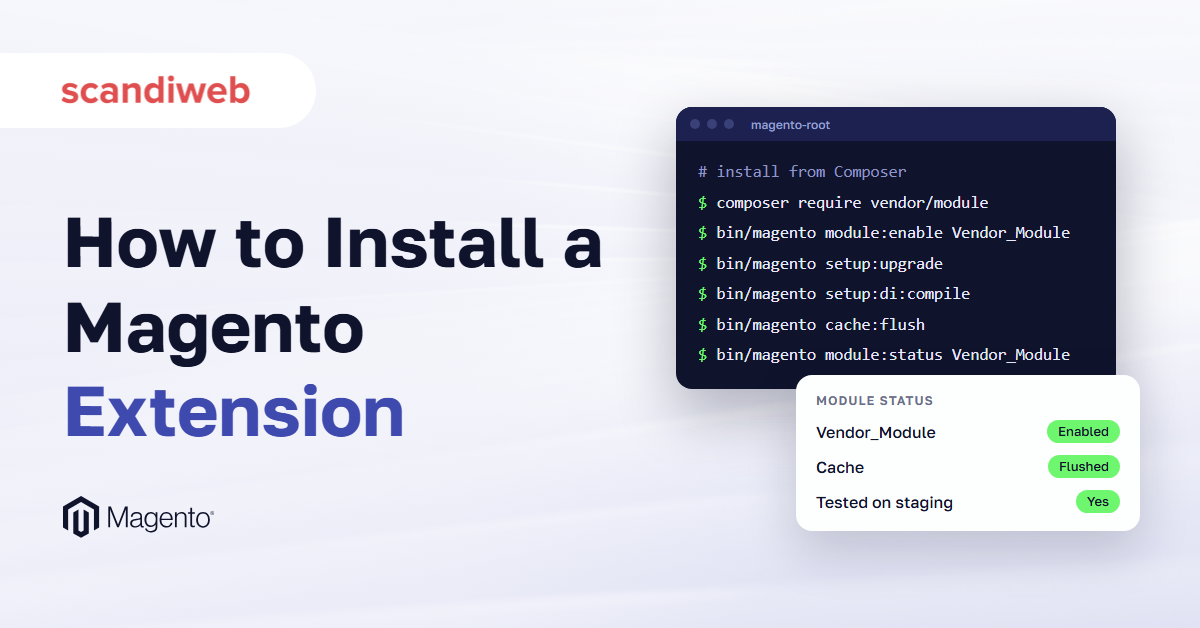
Installing an extension in Magento 2 (Adobe Commerce), an add-on that brings a feature such as a blog or a one-page checkout, takes a handful of commands. Most vendors print them right on the download page.
What goes wrong is everything around those commands. The extension may need a newer version of PHP, the programming language Magento runs on, than your server has. Or a second extension you already run may change the same part of checkout. Neither problem shows up while you type. You find out when a page fails to load or checkout stops taking orders, and if the install ran on the live store, your customers find out at the same moment.
What you need before you install a Magento 2 extension
Before you install an extension in Magento 2, you need command-line access to the server as the file system owner, the extension’s Composer name and version, and access keys from the Adobe Commerce Marketplace if you bought it there. You also need a staging copy of the store and a fresh database backup.
The file system owner is the server user that owns the Magento files. On shared hosting, Adobe says this is the user your provider gives you to log in. Staging is a private copy of the store that matches the live one, and every command in this guide runs there first.
Access keys for Adobe Commerce Marketplace extensions
To install a Magento 2 extension from the Marketplace, you need a pair of access keys. Magento extensions bought on the Adobe Commerce Marketplace, the former Magento Marketplace, download from repo.magento.com, which asks for them. You create access keys in the Marketplace under your account name > My Profile > Access Keys > Create a New Access Key. The public key is the username and the private key is the password.
Use the keys of the account that installed the store. Adobe says a key from another user or a shared account cannot be used. Check that your composer.json lists https://repo.magento.com/ under repositories. An extension bought from a vendor’s own site comes with the vendor’s own repository or a ZIP file instead.
An extension that matches your Magento and PHP versions
Open the extension’s composer.json and read its require block, or check the vendor’s listing, for the Magento and PHP versions it supports. Adobe’s advice for Cloud projects, to check the required PHP version before you begin, applies to every store.
If the extension needs a newer Magento release than yours, the install turns into an upgrade first: see how to upgrade Magento, and check the Magento version support dates to see whether your release still gets security patches. If your storefront runs on Hyvä, a theme that replaces Magento’s default Luma storefront, check now whether a compatibility module exists. The conflicts section below explains why.
A staging copy and a backup you can restore
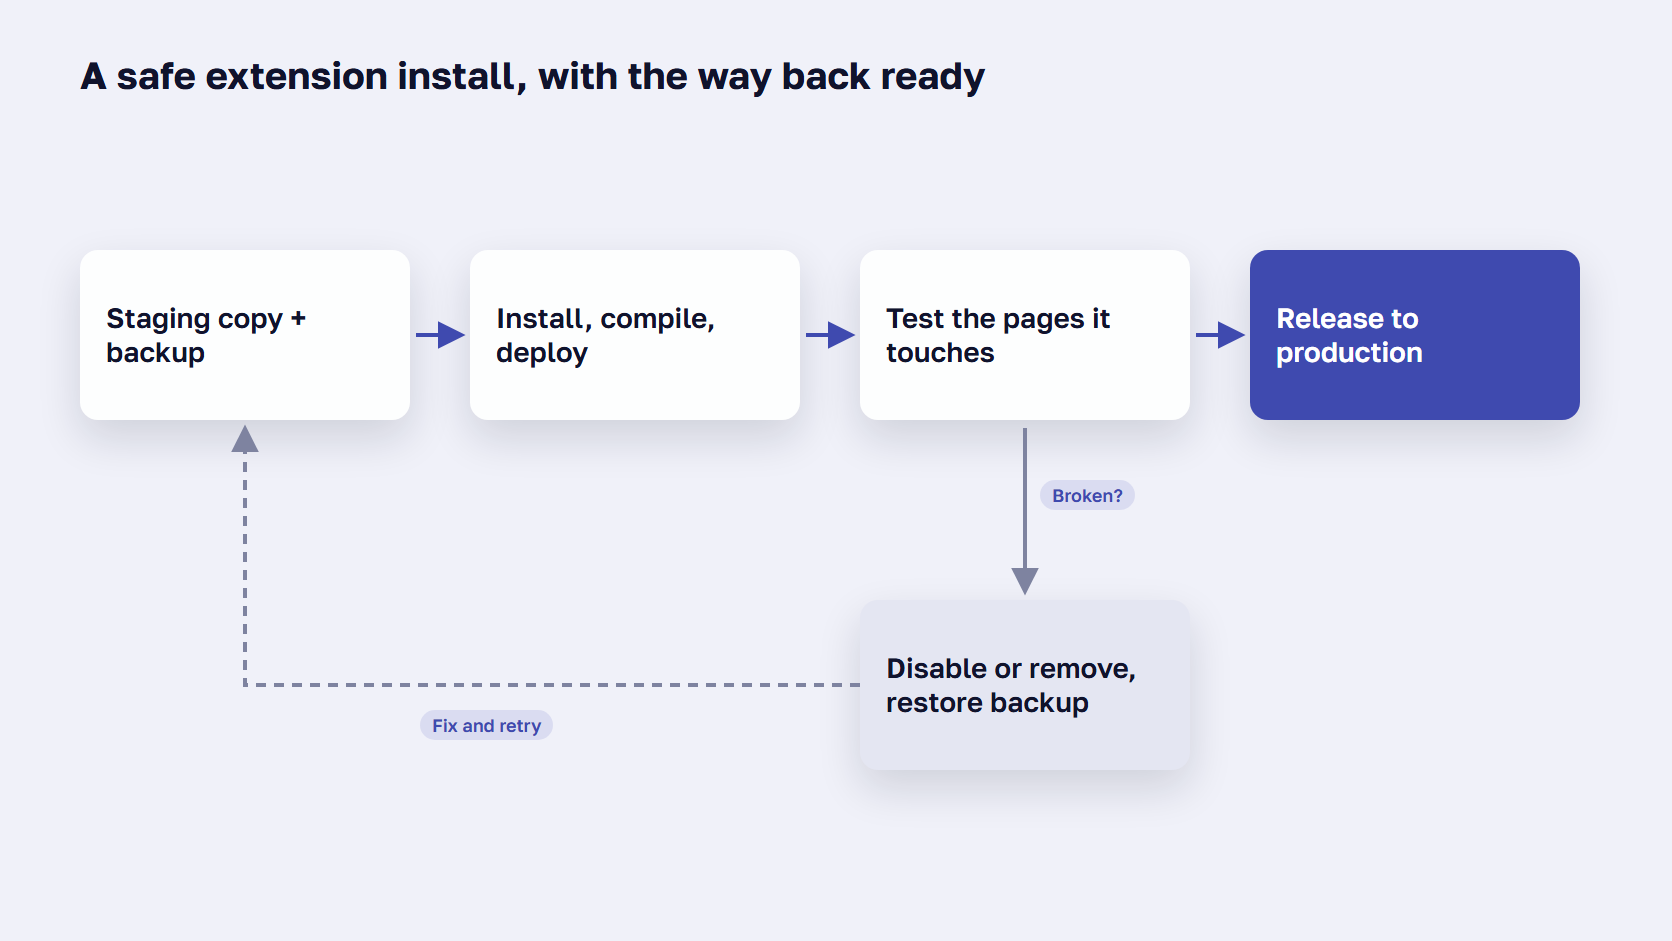
We’ve written about why staging and rollback matter for every extension, so two practical points are enough here.
Run every command on a copy of the store that matches production first. And take a database backup you can restore, with your host’s snapshot or a dump tool. Magento’s built-in backup command has been deprecated since 2.3.0 and is off by default, and Adobe points to other tools such as Percona XtraBackup.
🚀 Quick takeaway
Extensions from the Adobe Commerce Marketplace download from repo.magento.com, which asks for your access keys: the public key is the username and the private key is the password.
How to install an extension in Magento 2 with Composer
To install an extension in Magento 2 with Composer, turn on maintenance mode and run composer require with the extension’s name and version. Then enable it with bin/magento module:enable and run setup:upgrade, setup:di:compile, and, in production mode, setup:static-content:deploy. Clean the cache, turn maintenance mode off, and configure the extension in the admin.
- Turn on maintenance mode:
bin/magento maintenance:enable(add--ip=and your IP address to keep your own access). - Add the extension:
composer require vendor/module-name:version, for example Adobe’scomposer require j2t/module-payplug:2.0.2. If Composer asks for a username and password, enter your public key as the username and your private key as the password. Wait until Composer finishes without errors. - Check that it arrived:
bin/magento module:status Vendor_ModuleName. The module name differs from the Composer name, and a new extension usually shows as disabled. - Enable it:
bin/magento module:enable Vendor_ModuleName --clear-static-content - Register it:
bin/magento setup:upgrade - Compile the code:
bin/magento setup:di:compile - In production mode, deploy static files:
bin/magento setup:static-content:deploy(add your store’s locale codes, such asen_US de_DE, if it runs more than one language). - Clean the cache:
bin/magento cache:clean - Turn maintenance mode off with
bin/magento maintenance:disable, then configure the extension in the admin.
The order follows Adobe’s guide to third-party extensions, with the static content deployment added for production mode. Composer is the PHP package manager Magento uses to download and track extensions. For what it does behind each command, our developer guide to installing a Composer package goes one level deeper.
Developer mode or production mode: what changes
Check the mode with bin/magento deploy:mode:show. In production mode, Magento doesn’t generate static files such as CSS and JavaScript on its own, so step 7 is required. You may also be asked to rerun the compile command, and errors go to log files, never to the visitor’s screen.
In developer mode, Magento compiles automatically and builds static files when a page asks for them, but Adobe still says to clean the old ones when you enable a module, which the --clear-static-content option in step 4 does. Errors display in the browser. Developer mode is not supported on Adobe Commerce Cloud.
🚀 Quick takeaway
After composer require, the extension is usually still disabled. It only runs once module:enable and setup:upgrade have registered it.
How to install a Magento 2 extension manually from a ZIP file
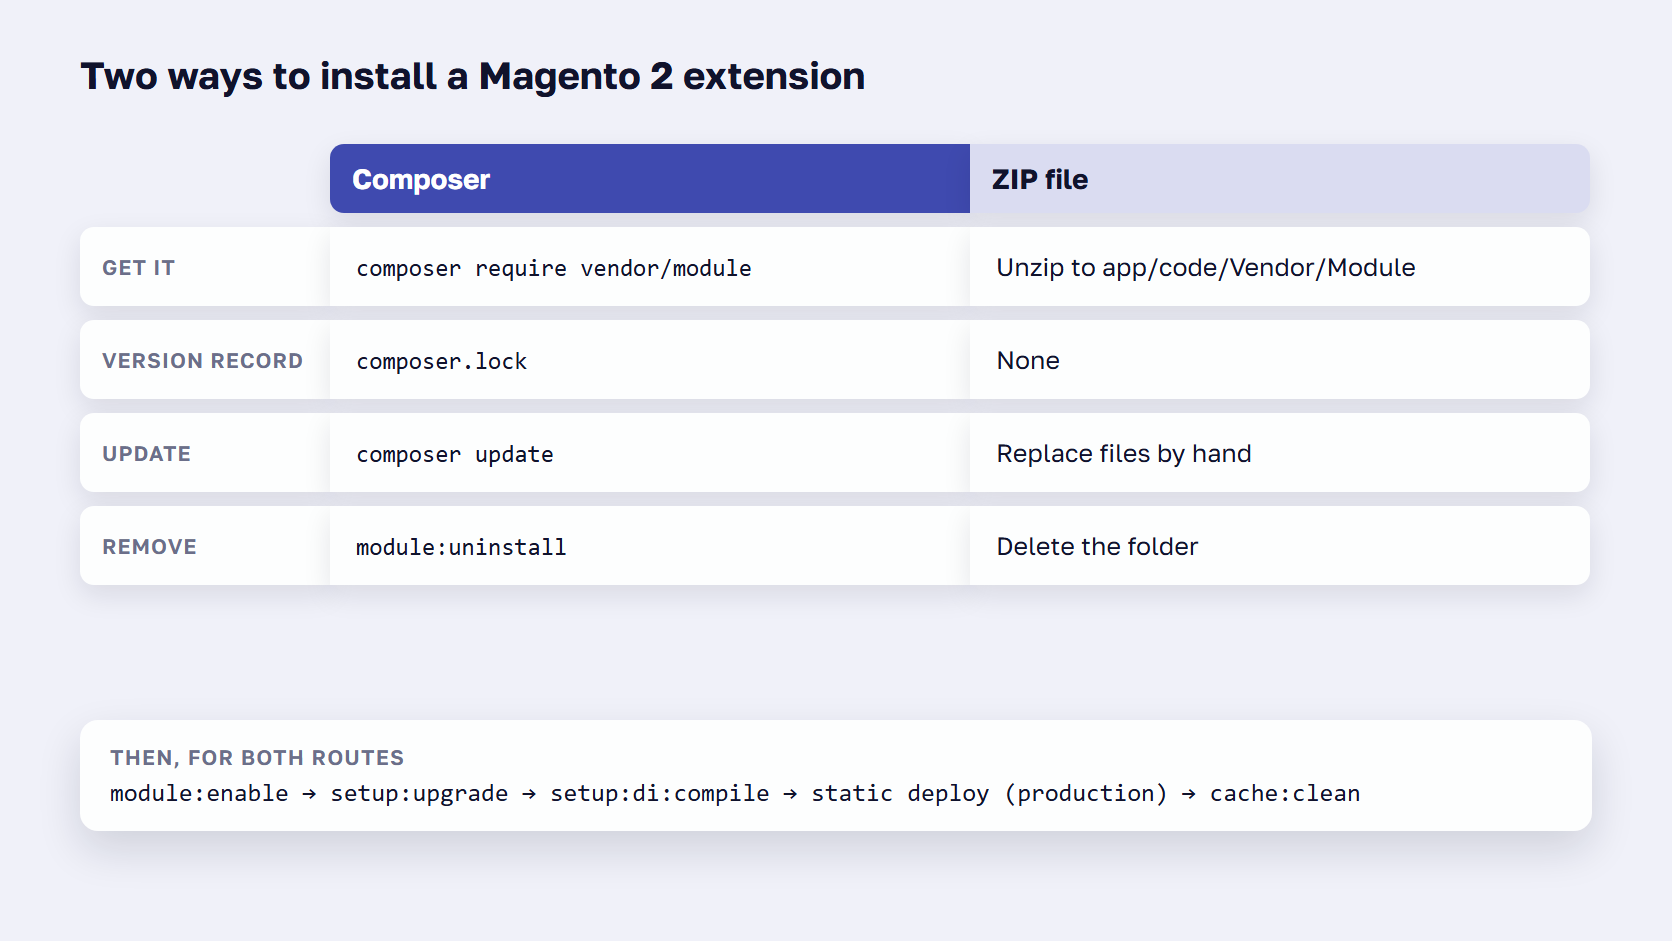
To install a Magento 2 extension from a ZIP file, unpack it into app/code/Vendor/Module so that registration.php is in the root of that folder. Then run the same commands as a Composer install: module:enable, setup:upgrade, setup:di:compile, static content deployment in production mode, and cache:clean. Composer remains the safer route for updates and removal.
Composer puts modules in the vendor folder. A module you unpack yourself goes in app/code, where Adobe recommends keeping a store’s own code.
- Unpack the archive into
app/code/Vendor/Module, with the vendor and module folder names from the package. Check thatregistration.phpis directly in that folder: every module needs one in its root. - If the vendor includes a shared base module, unpack that too. Mageplaza’s ZIP route, for example, has you download its Mageplaza_Core module separately, because a ZIP doesn’t pull in other packages the way Composer does.
- Run every command as the file system owner, the server user that owns the Magento files (on shared hosting, the user your provider gives you to log in).
- Turn on maintenance mode on a live store, then run steps 3 to 9 of the Composer list:
module:status,module:enable,setup:upgrade,setup:di:compile, static content deployment in production mode,cache:clean.
Why Composer is the safer route
The commands after a ZIP install are identical. Composer earns its place in what happens afterwards.
- composer.lock records the exact version of every package, so staging and production run identical code once you commit it.
- An update is one command,
composer update vendor/module-name, followed by the usual upgrade and deploy steps. - Adobe’s
module:uninstallcommand works only for Composer packages. A ZIP install has to be removed by hand. - Composer checks the extension’s PHP requirement against the PHP version on your server before anything is installed.
A ZIP into app/code is still the right place for a custom module built for your own store.
🚀 Quick takeaway
Adobe’s module:uninstall command works only for Composer packages, so an extension unpacked into app/code has to be removed by hand.
How to check the install and spot extension conflicts
Run bin/magento module:status with the module name to confirm the extension is enabled, then test every page it touches. If something breaks, bin/magento dev:di:info lists the plugins and the preference that change a class, so you can see whether two extensions modify the same code. On a Hyvä storefront, also check for a compatibility module.
After you install an extension in Magento 2, three checks tell you whether it is safe to release.
Confirm the extension is enabled
Run bin/magento module:status Vendor_ModuleName and look for “Module is enabled”. Then open the extension’s settings in the admin and load the storefront pages it changes. If the storefront shows errors, Adobe’s tip is bin/magento cache:flush. In production mode, errors go to the log files, so a blank or broken page means a trip to the logs.
Plugins and preferences: when two extensions change the same code
A plugin runs extra code before, after, or around a Magento function. When several plugins target the same function, Magento runs them in the order set by each plugin’s sortOrder, and Adobe says this approach reduces conflicts among extensions that change the same class. A preference replaces a whole Magento class with the extension’s own class, and two extensions that replace the same class can clash. Magefan, an extension vendor, says rewriting existing classes often leads to conflicts.
To see what already changes a class, run bin/magento dev:di:info "Magento\Checkout\Block\Onepage\Success", swapping in the class you care about (this one is Adobe’s own example, the checkout success block). The command prints the preference and the plugins on that class. Run it for the classes the new extension touches, before and after the install, and compare. Vendors can also declare known conflicts in the conflict field of composer.json, and Magento then won’t enable both modules at the same time.
Hyvä compatibility modules
Hyvä is a lighter storefront theme that replaces Magento’s default Luma theme. Extensions built for Luma or the blank theme need a compatibility module, which re-implements the parts that don’t work on a Hyvä storefront. The Hyvä docs on Hyvä compatibility modules point to the Compatibility Module Tracker, which lists the compatibility modules that exist and the state each one is in. Check it before you buy, and install the compatibility module together with the extension.
🚀 Quick takeaway
bin/magento dev:di:info lists every plugin and the preference on a class, so you can see which extensions already change checkout before you add another.
How to disable or uninstall a Magento 2 extension
To roll back an extension quickly, disable it with bin/magento module:disable and clean the cache. To remove it for good, run composer remove for a Composer install, or delete its app/code folder for a ZIP install, and take it out of config.php. Ask the vendor how to revert its database changes, and test the removal on staging first.
Adobe’s advice is to uninstall a module only if you’re certain you won’t use it again, and to disable it otherwise.
- Roll back fast:
bin/magento module:disable Vendor_ModuleName --clear-static-content, then clean the cache (recompile withsetup:di:compilein production mode). Disabling keeps the code and data, so you can turn it back on. - Remove a Composer install: Adobe’s module:uninstall command,
bin/magento module:uninstall Vendor_ModuleName, works for Composer packages only. It runscomposer removeand handles maintenance mode itself. Add--remove-dataonly if you want the module’s database tables and data gone too. Or runcomposer remove vendor/module-namedirectly. - Remove a ZIP install:
rm -rf app/code/Vendor/Module, then take the module out ofapp/etc/config.phpif that file is in source control, and runsetup:upgrade. - Database changes: ask the vendor how to revert its tables and data. Adobe says to get those instructions from the vendor.
- Order: do it on staging first and check the store works there, then repeat on production.
How extension installs work on Adobe Commerce Cloud
On Adobe Commerce Cloud, you install an extension on your own machine, in a development branch: run composer require with –no-update, then composer update, and push composer.json and composer.lock with git. The deployment enables the extension for you. Adobe says never to enable or disable an extension while logged in to a remote environment.
Adobe recommends a development branch for every extension you add. The steps, from Adobe’s Cloud extension guide:
- On your machine, open the project folder and create or check out a development branch.
composer require vendor/module-name:version --no-updatecomposer updategit add -A, then commit with a message such as “Install vendor/module-name”.git push origin <branch-name>- After the build and deploy finish, log in to the environment over SSH and run
bin/magento module:status Vendor_ModuleName.
Two things differ from a self-hosted store. Buy Marketplace extensions with the same account (MAGEID) that owns the Cloud project, which Adobe says avoids installation issues. And the deployment puts the site in maintenance mode by itself.
The push must include composer.lock, because the remote environment reads it to install the same versions you tested. If you enable a module locally, run ./vendor/bin/ece-tools module:refresh and commit app/etc/config.php.
🚀 Quick takeaway
On Adobe Commerce Cloud, you never enable an extension on the server. You commit composer.json and composer.lock, and the deployment does the rest.
How to install a Magento 2 extension without the command line
Magento 2.4 can’t install extensions from the admin: Adobe removed the Web Setup Wizard in 2.4.0, so every install runs from the command line. If you don’t have command-line access, someone else has to run the commands for you, either a developer with access to your server or an AI agent that works on a copy of your store.
The first route is a developer with access to your server, from your agency, your host, or a freelancer, who runs the Composer steps above on staging first. Ask for the module:status output and a test of the pages the extension changes before the production release.
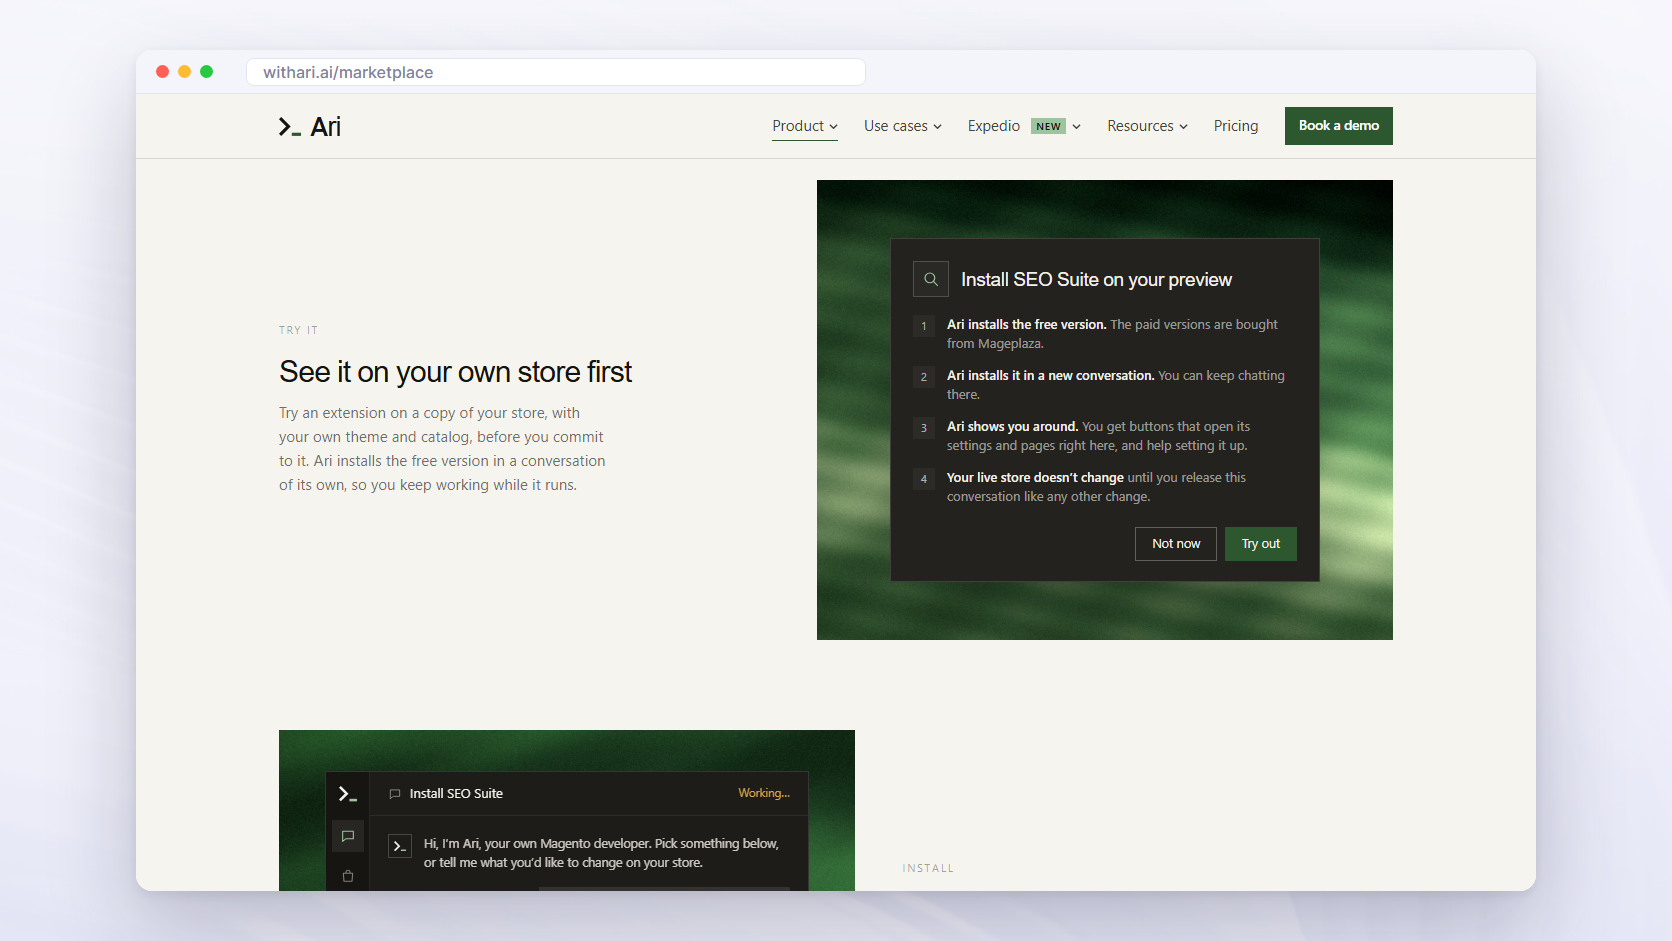
Ari, the AI agent for Magento built by scandiweb, is one way to do it from a chat. Its marketplace lists ready-made extensions from vendors including Amasty, Mageplaza, MagePal, Magefan, WeltPixel, and Yireo, and Ari works with 1,000+ extensions, custom ones included. Ari installs the free version on a copy of your store with customer data removed, checks it against your theme and the modules you already run, and shows you how to set it up.
Your live store doesn’t change until a person approves the release, which arrives as a pull request. Paid versions are bought from the vendor, and Ari plans start from €99 a month per store. You can browse the marketplace and install Magento extensions in chat.
Frequently asked questions about installing Magento 2 extensions
What is the difference between a Magento extension and a module?
A Magento extension is packaged code that adds to or changes what Magento does. Adobe counts three kinds: modules add features, themes change how the storefront and admin look, and language packages translate them. Most extensions sold on marketplaces are modules, so in everyday use the two words mean the same thing.
Is the Magento Marketplace the same as the Adobe Commerce Marketplace?
Yes. The old Magento Marketplace address, marketplace.magento.com, now redirects to commercemarketplace.adobe.com, Adobe’s store for free and paid extensions. Adobe says every extension listed there passes its Extension Quality Program, an automated check plus a manual review. To install one, you need the access keys from your Marketplace profile.
Why doesn’t my new extension show up in the Magento admin?
Usually the extension is still disabled or the cache is out of date. Run bin/magento module:status with the module name, because Adobe notes a new extension is probably disabled after composer require. Enable it, run setup:upgrade and setup:di:compile, then clean the cache. If the storefront shows errors, run bin/magento cache:flush.
Do I need maintenance mode to install a Magento extension?
Adobe lists it as optional, but it is the safer choice on a live store. bin/magento maintenance:enable shows visitors a 503 maintenance page while the commands run, and the --ip option lets your own IP address through. On Adobe Commerce Cloud, the deployment switches maintenance mode on by itself.
Do I need to run setup:static-content:deploy after installing an extension?
Only in production mode. There, Magento doesn’t generate CSS, JavaScript, and image files on demand, so a new extension’s files don’t appear until you deploy them with setup:static-content:deploy. In developer mode, Magento builds those files when a page asks for them, so clearing the old ones with --clear-static-content is enough.
How do I update a Magento 2 extension?
For a Composer install, run composer update vendor/module-name, or composer require vendor/module-name with the new version. Then run bin/magento setup:upgrade --keep-generated, setup:static-content:deploy, and cache:clean, as in Adobe’s guide. Check the new version’s Magento and PHP requirements before you start, and run the update on staging first.
Before your next Magento 2 extension install
Installing an extension in Magento 2 takes a few commands, and Adobe documents each one. The work that protects your store happens around them: the version check, the conflict check, the staging run, and the rollback plan. Do them in that order, on a copy of the store, before the extension reaches production.
Prefer Composer where the vendor offers it, since it records the exact version and makes updates and removal one command. A ZIP into app/code still works for a module built for your own store. If nobody on your side has command-line access, hand the job to a developer or to an agent that works on a copy, so the live store changes only when you say so. If you’d rather not run installs and rollbacks yourself, talk to scandiweb’s Magento support team.
If you'd like a second pair of eyes before the next install, send us the extension name and your Magento version.